AI Photo Editing Tutorial
This tutorial covers everything you need to get professional results with RogerApp.ai — from understanding the interface to mastering the editing features that experienced users rely on daily.
RogerApp.ai is an AI photo editing tool built for e-commerce, dropshipping, and real estate professionals who need production-ready images without a photographer or a design team. Whether you are editing one hero image or working through an entire product catalog, the same workflow applies — and each edit builds on the last without image degradation. If you are looking for the best AI photo editing app in 2026 for product photography, this tutorial is the place to start.
What makes RogerApp.ai different from single-model AI tools is that it automatically selects the best combination of leading AI models for each specific task — without you needing to know which model does what. You write the prompt, RogerApp.ai picks the right engine.
Who this tutorial is for:
- E-commerce sellers who need professional product photos without a photographer
- Dropshippers who need to transform supplier images into sales-ready catalog photos
- Real estate professionals who need listing photos that show properties at their best
- Anyone who wants to edit AI-generated or real photos with precision and repeatability
For e-commerce-specific use cases, see the E-commerce Guide. For real estate-specific workflows, see the Real Estate Guide for Use Cases.
Table of Contents
- Getting Started — Your Workspace
- How to Write Effective Prompts
- Generate New Images
- How to Edit Photos with AI — Prompts, Masking & Precision Tools
- AI Background Removal — Remove, Replace & Merge
- AI Image Merger, Super Resolution & Object Editing
- Quick AI Photo Enhancements — Color, Lighting & Perspective
- AI Clothes Changer — Fashion, Jewelry Try-On & Consistent Characters
Getting Started — Your Workspace
RogerApp.ai has two main working areas. The Chat View is where you generate new images from text descriptions. The Photo Editor is where you edit, merge, and refine existing photos. Most workflows move between both: generate or upload first, then refine in the editor.
Understanding the specific strengths of AI photo editing — and knowing which tool to use for which task — is what separates fast, professional workflows from time-consuming trial and error. RogerApp.ai is built around the key AI photo editing strengths that matter most for product photography: precision control, no image degradation, and automatic model selection per task. This section walks you through exactly what each part of RogerApp.ai does and when to use it.
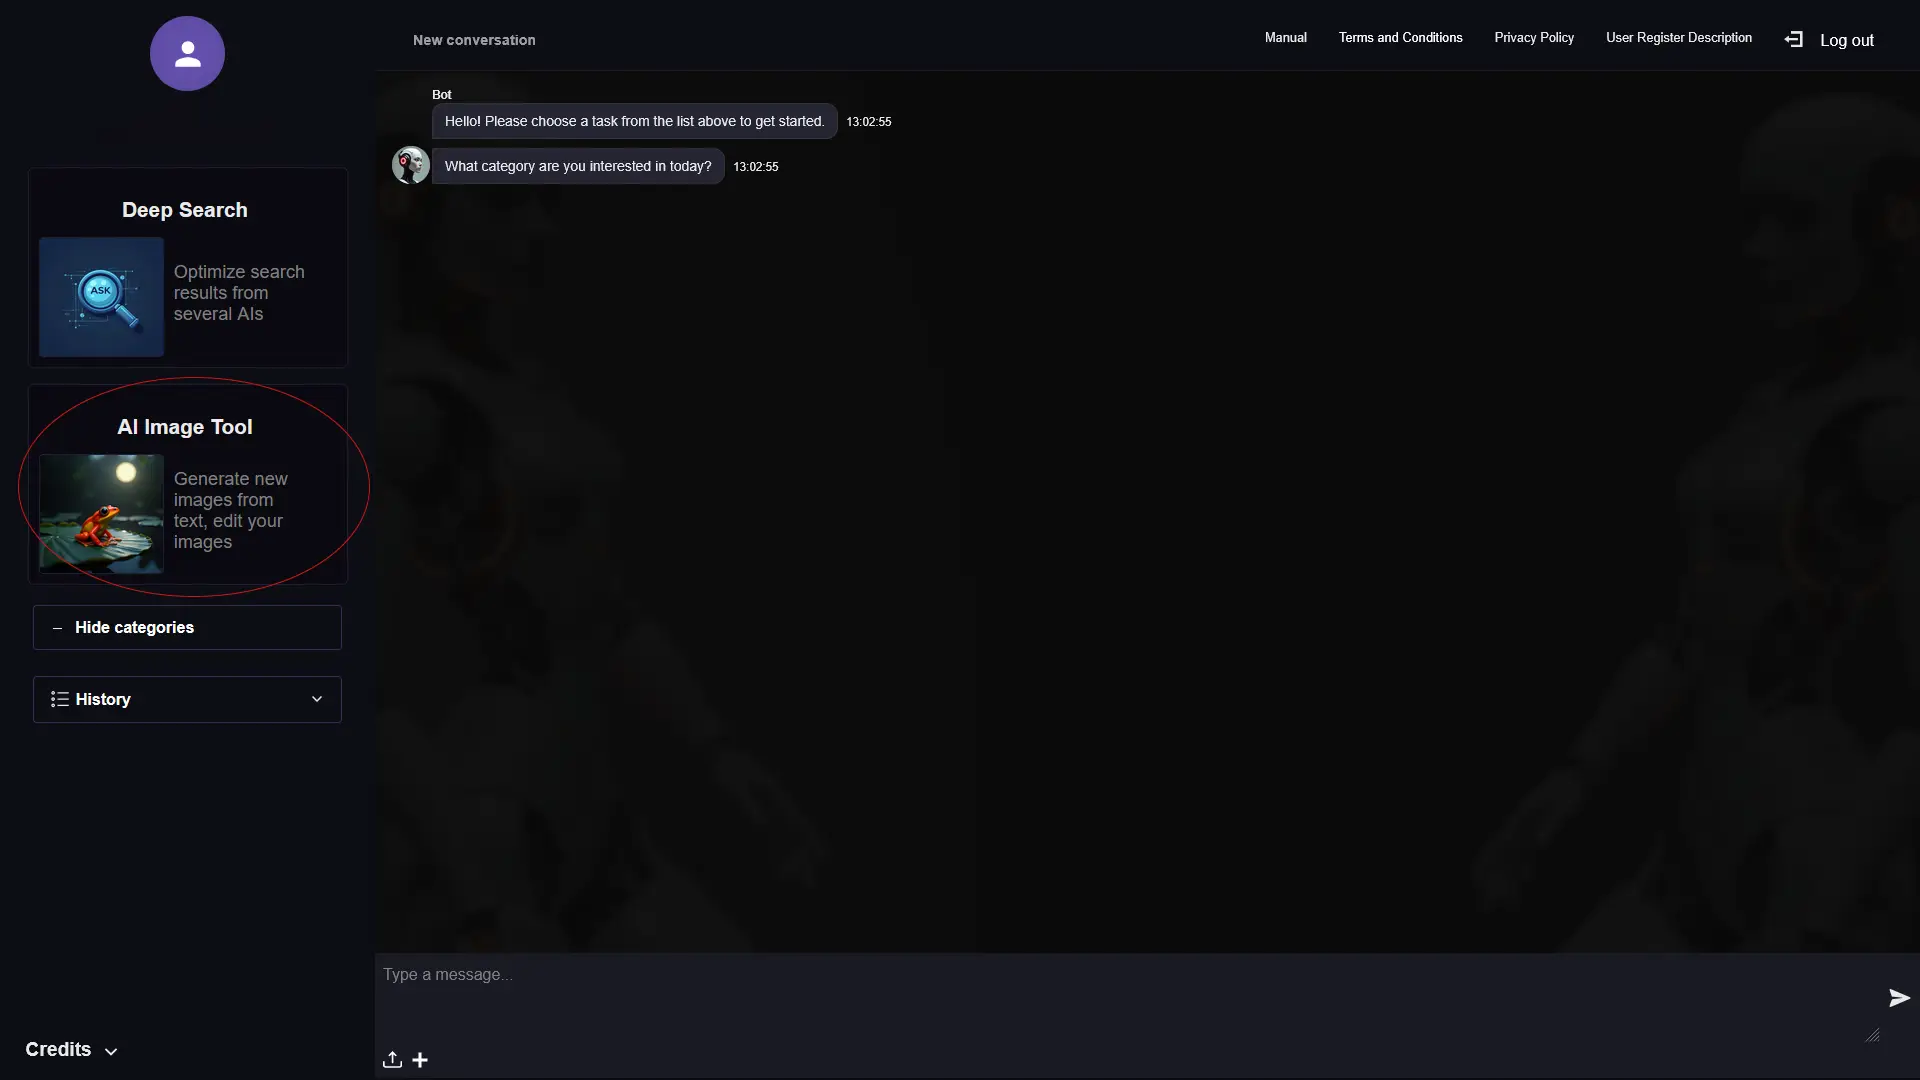
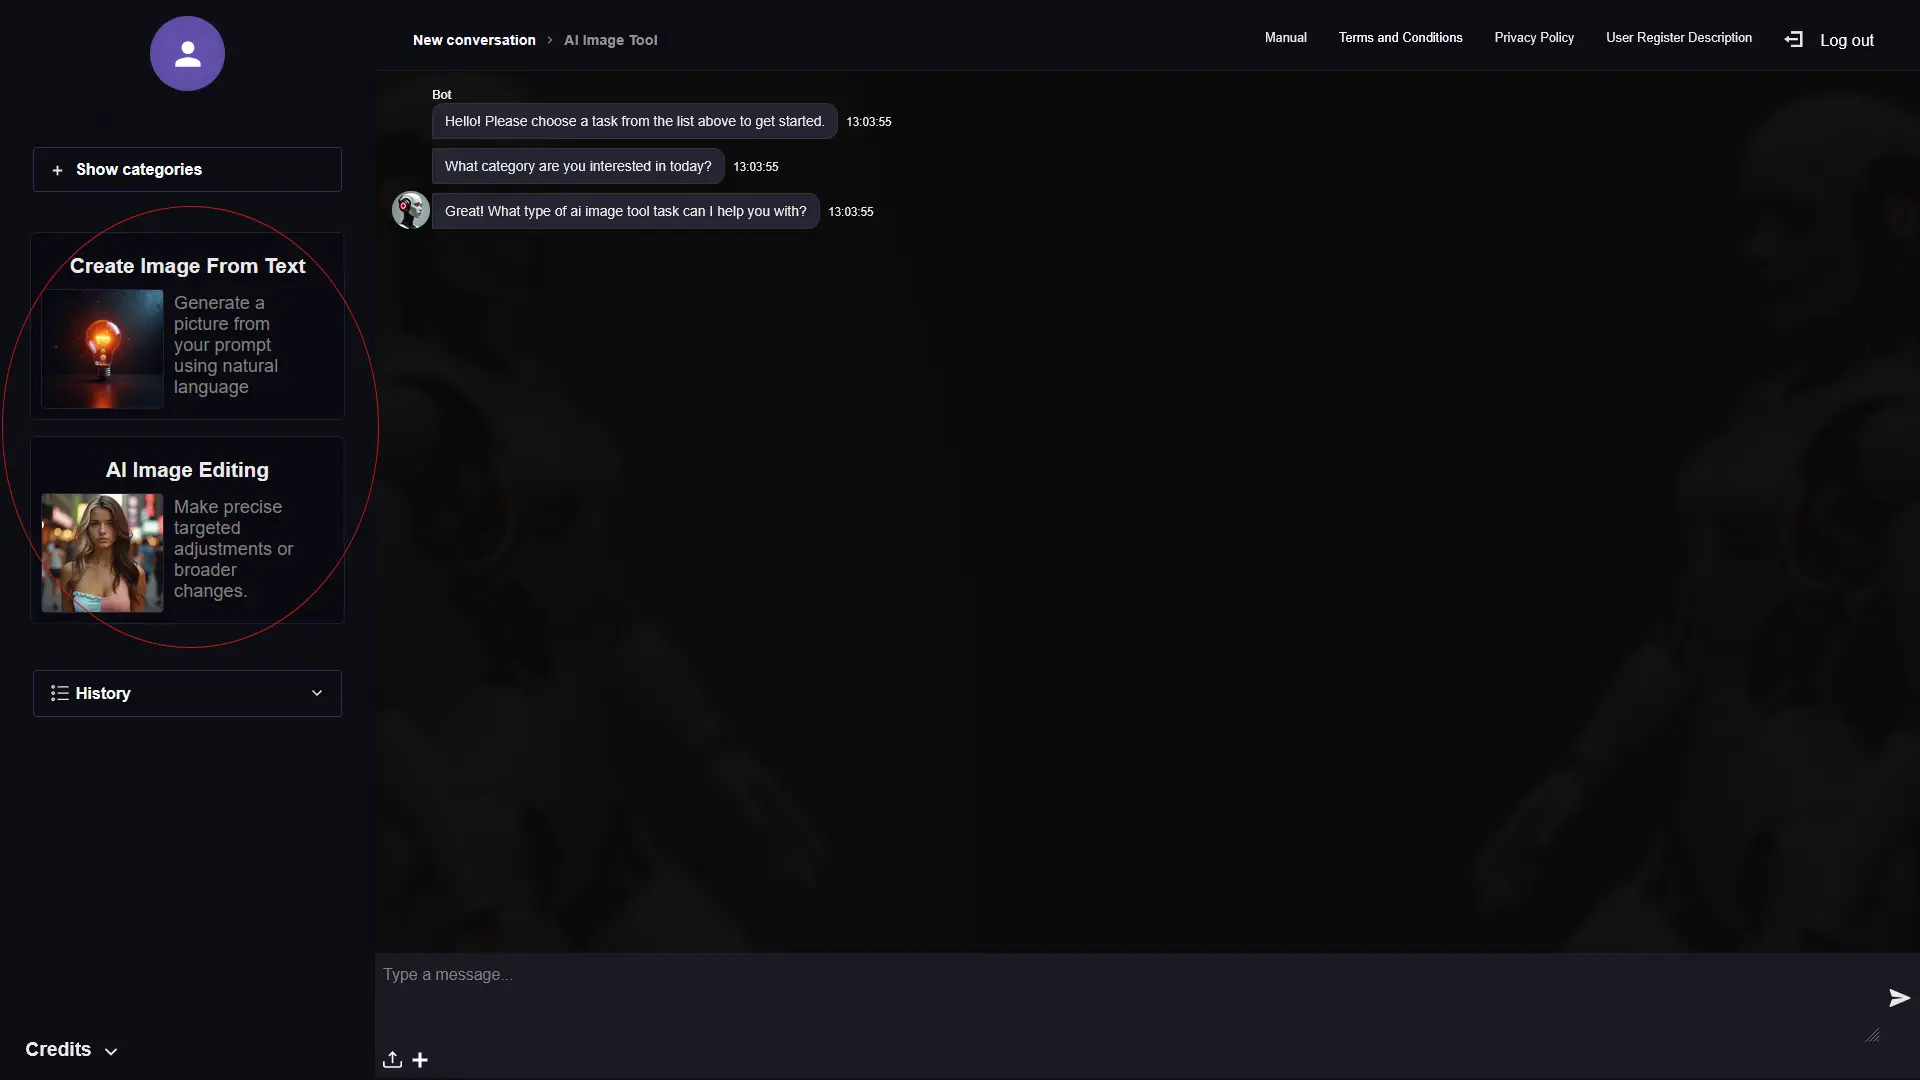
Chat View
This is the view you get when you log in to RogerApp.ai. You have the basic chat view and on the left you have the selections for the Deep Search and the Image Tool. You can either start directly writing your prompt on the main view to create a new photo or your Deep Search request, or choose which tool you wish to use and get more selections to choose from.
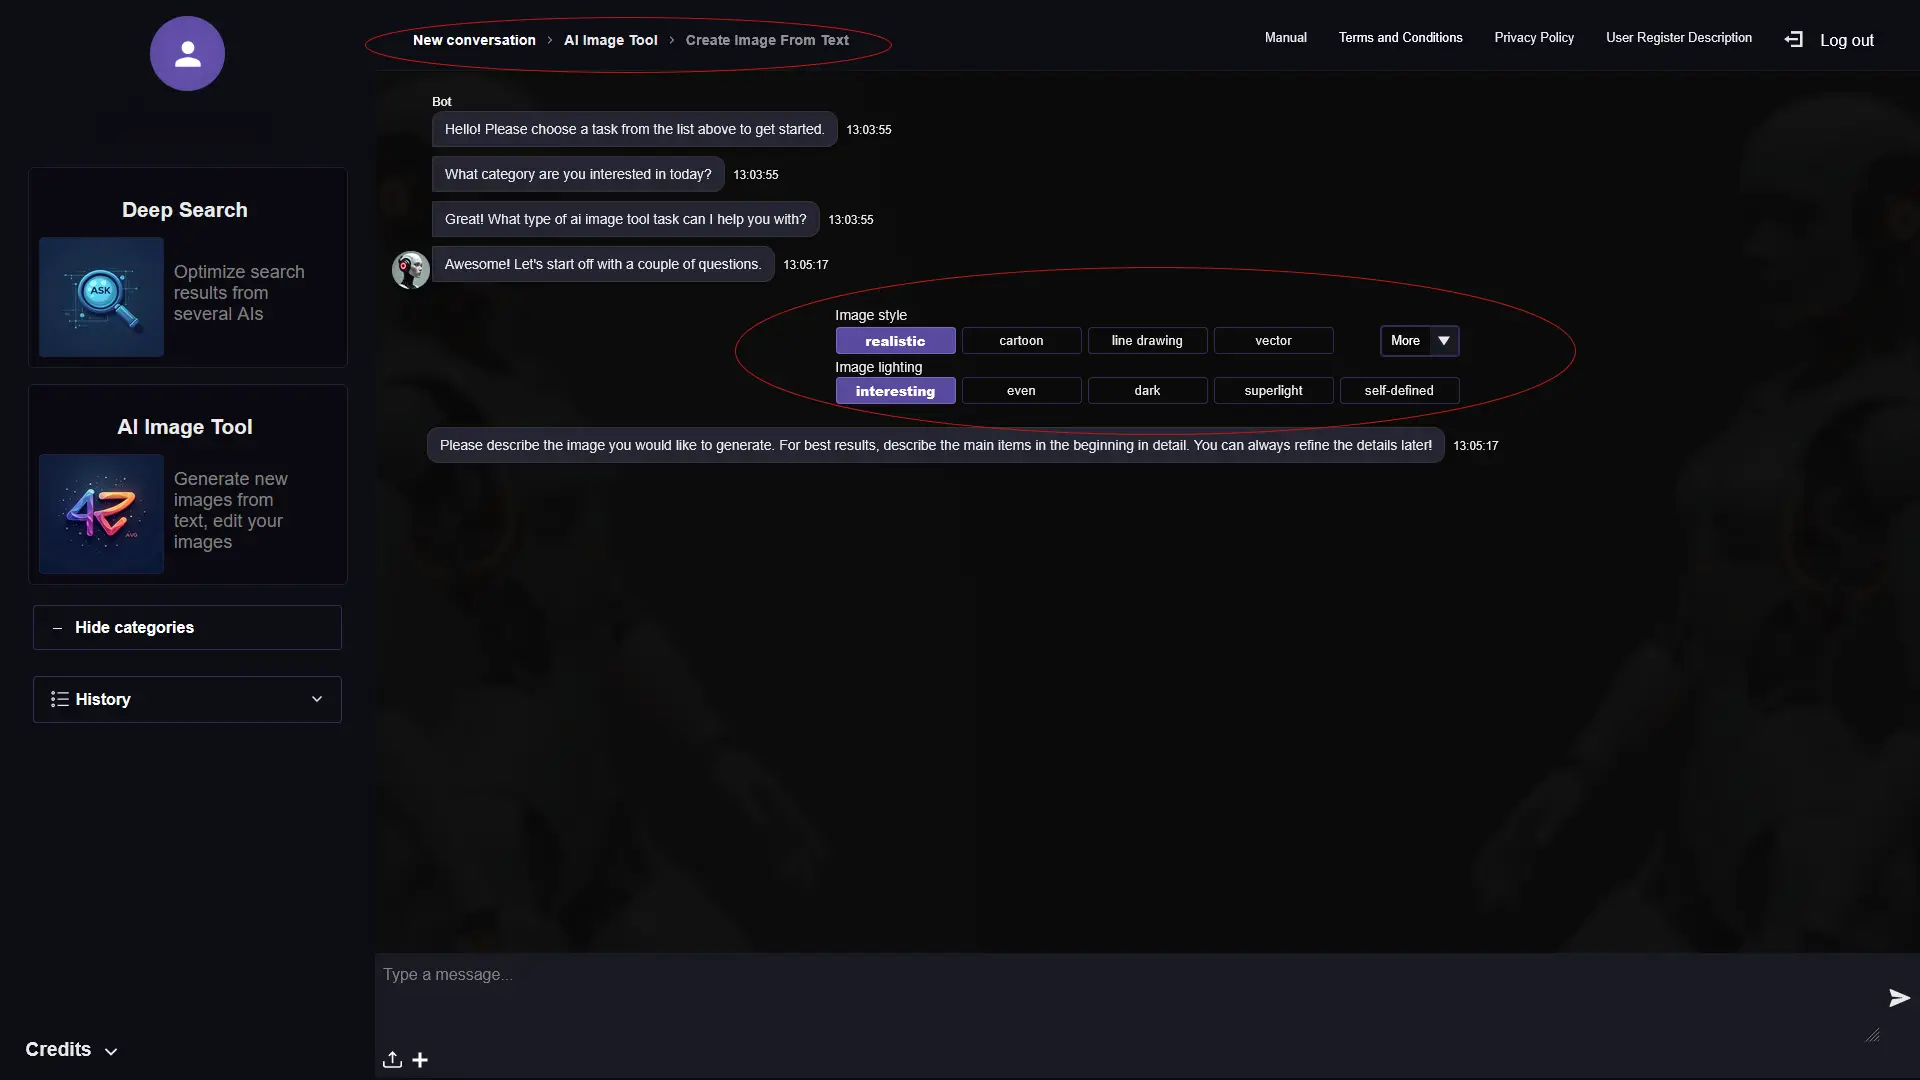
Settings before generating:
- Style — line drawing, vector, 3D model and many more options
- Lighting & camera positioning — control the mood and angle of your image
- Image variations — default is 2 options to choose from. Adding more variations won’t use more than 1 credit.
Regenerate: When you regenerate results, RogerApp.ai also chooses other combinations of AI models to create new image options. This costs one additional credit.
After getting results, you can confirm your desired option or open the editor to continue editing.
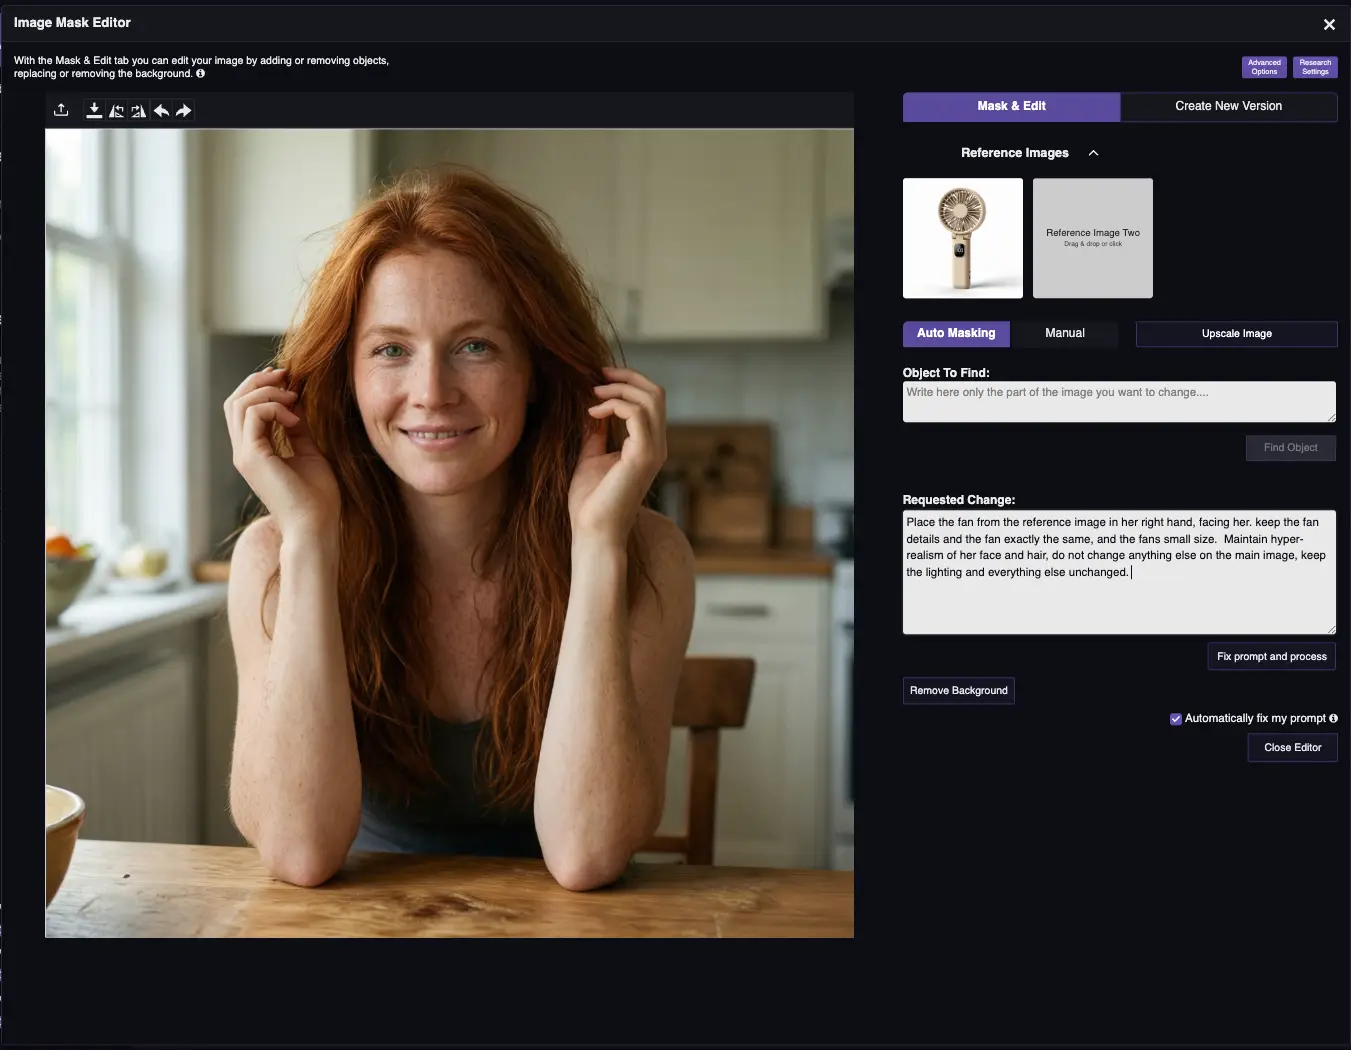
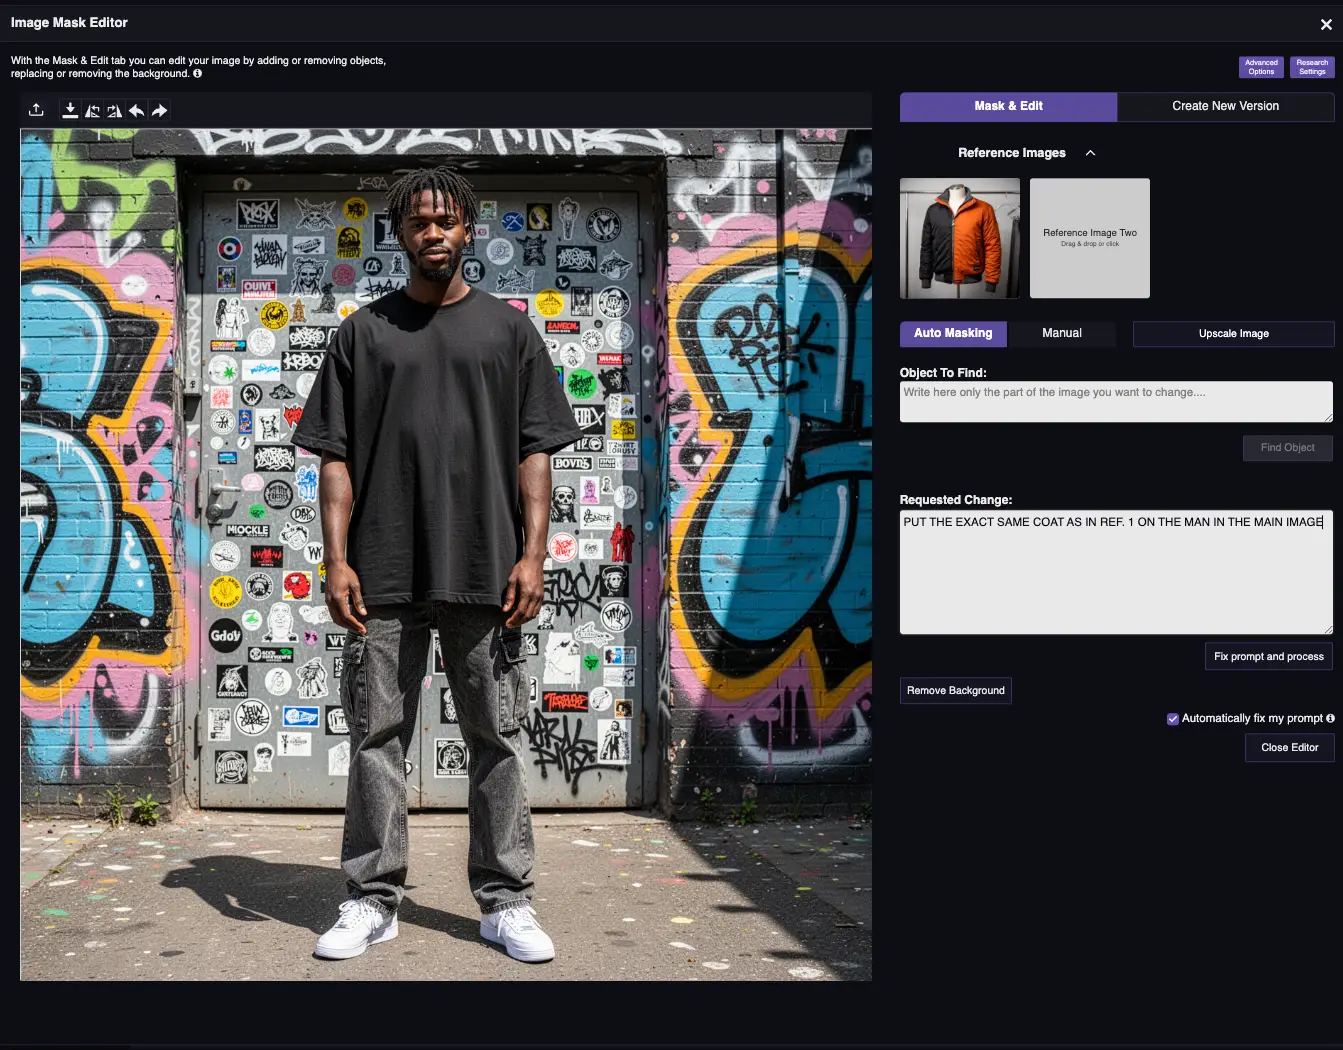
Photo Editor
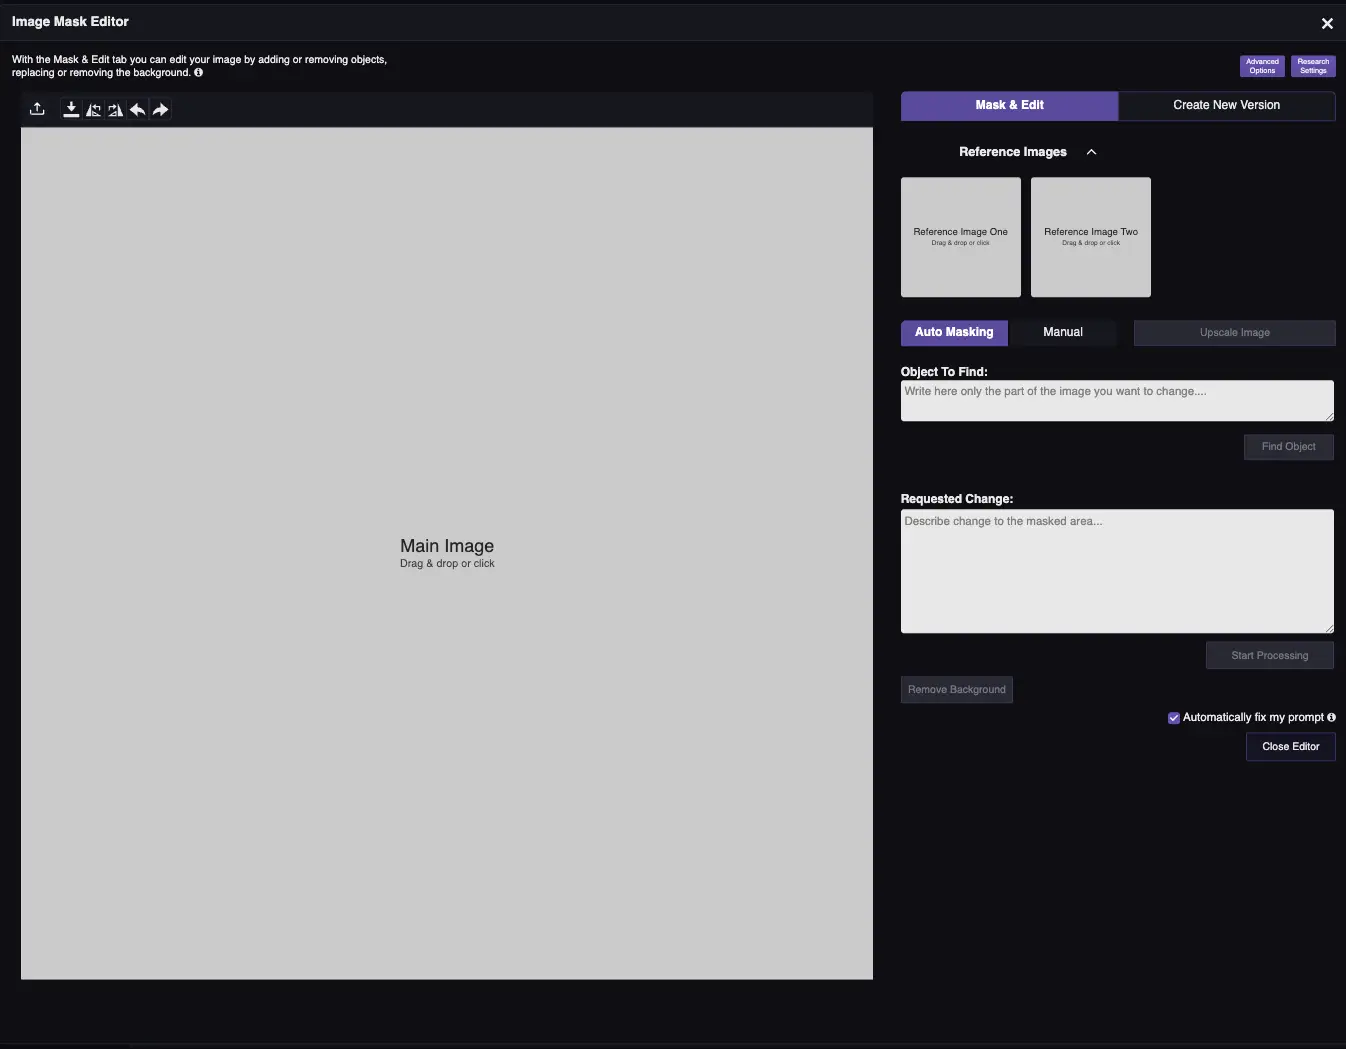
This is the RogerApp.ai Photo Editor. Unlike basic AI tools where repeated edits degrade image quality, RogerApp.ai lets you edit the same photo as many times as you need without the photo breaking down or making changes you don’t want. This makes it practical for real production workflows where a single product image may go through multiple rounds of refinement.
On the right top corner you have two tabs: Mask & Edit and Create New Version.
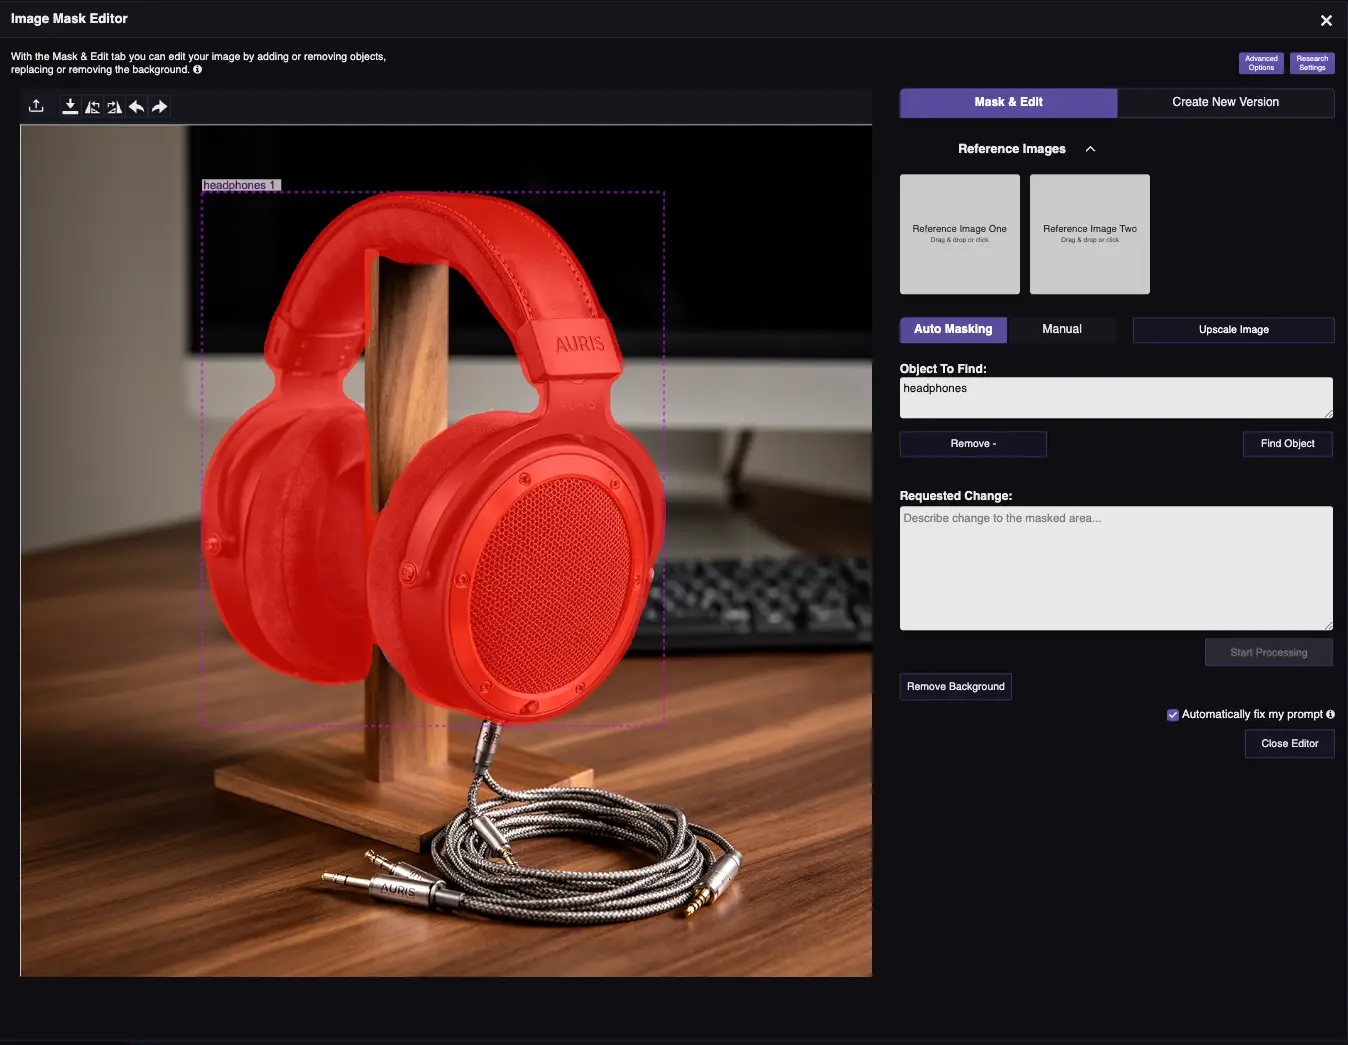
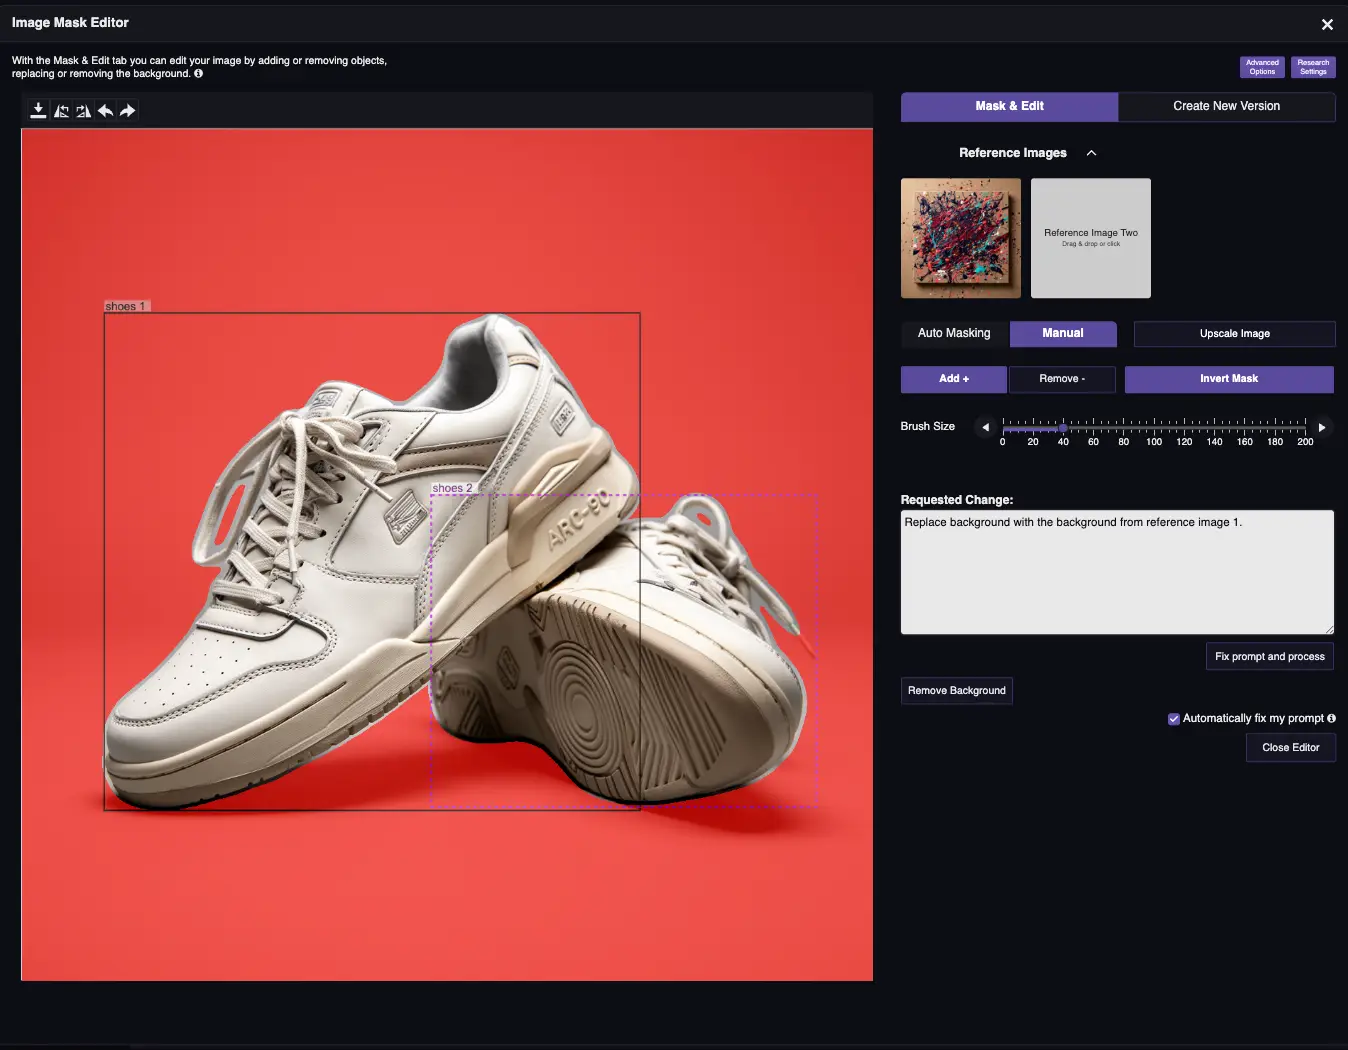
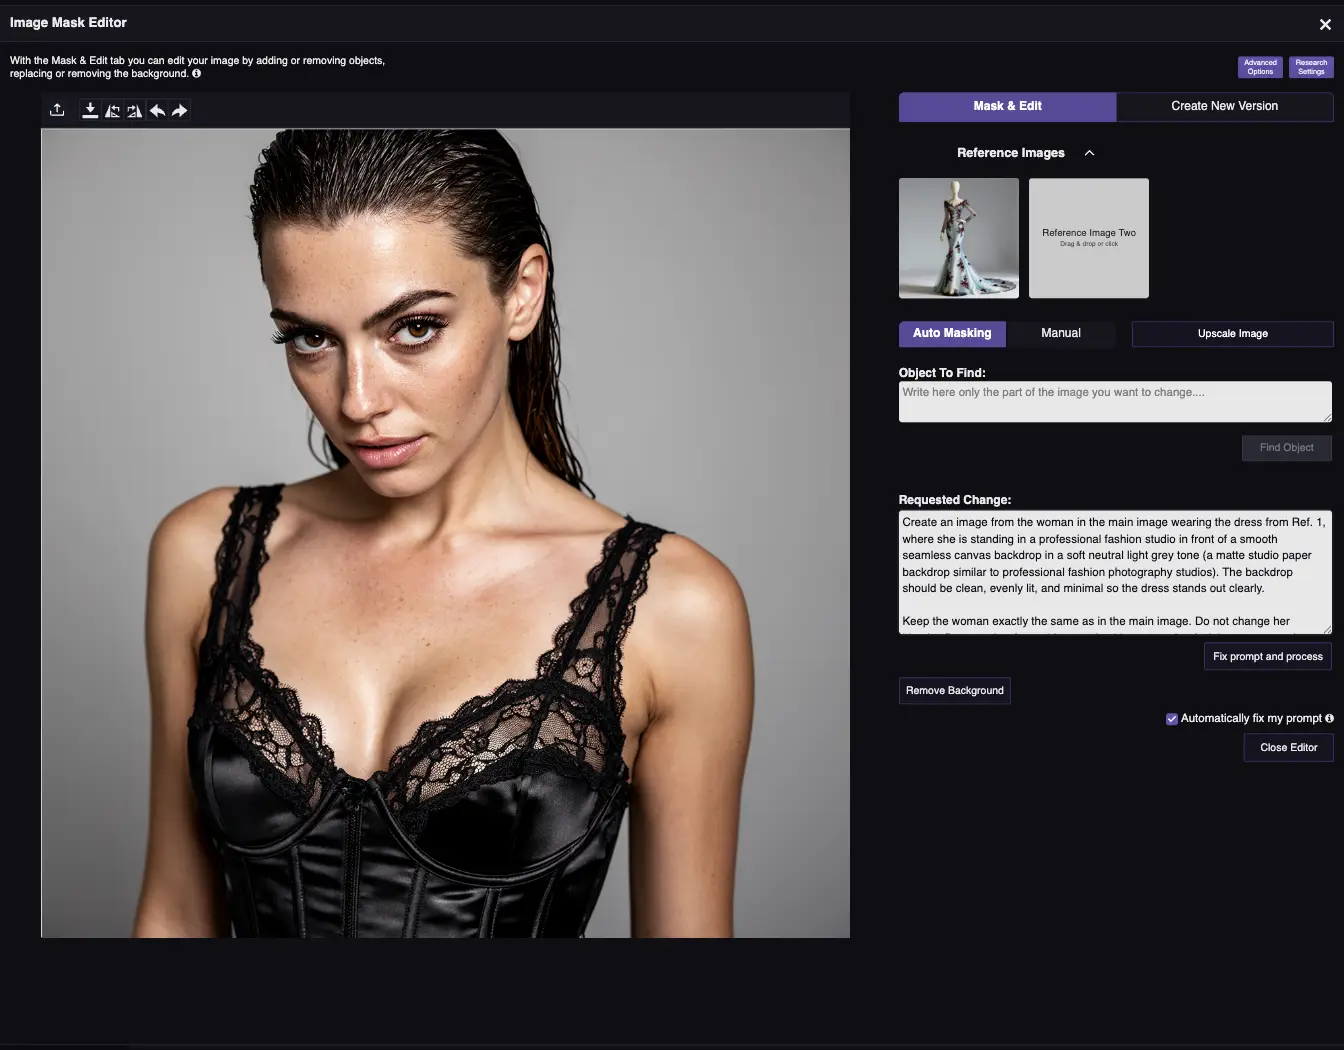
Mask & Edit tab:
- Main photo box — upload or select the image you want to edit
- Reference Photos (2 smaller boxes) — Optional. Using reference photos is not necessary, and it’s often easier to get the desired result by merging with only one reference photo at a time and making multiple edits rather than merging three images together at one go — especially in the beginning.
- “Object to find” — Auto-Masking feature. Can be most of the time left empty as the tool can mask automatically when needed, but for very specific edits it’s incredibly useful — such as changing hair color when you want to keep the hair exactly the same otherwise.
- “Manual” button — opens Manual Masking (see section below)
- “Requested Change” — this is where you write your prompt.
Create New Version tab:
- Upload an image you’d like to use as reference, then create a similar photo while gaining full ownership of the new image.
- Styles — create cartoon styled image, line drawing and many other options.
- Background removal button (one-click)
Masking Tools Overview
Masking is the precision control that separates basic AI editing from professional results. RogerApp.ai offers three masking approaches that work together.
| Tool | What it does | Best for |
|---|---|---|
| Manual Masking | Paint exactly the area you want to change | Fine detail work, finishing touches, correcting auto-mask area |
| Auto-Masking | Type an object name, AI finds and masks it | Quick selection of specific objects (hair, shoes, background) |
| Reverse Mask | Protect your selection, change everything else | Background changes while keeping product untouched |
Pro tip: Masking is often not necessary — simple text prompts handle most edits. But for professional-quality results and precise control, masking is the feature that gives you the edge.
How to Write Effective Prompts
Writing good AI prompts for photo editing is the single skill that most affects your result quality. RogerApp.ai works in 100+ languages, so you can write in your native language. You only have one prompt box — put everything you need in one clear, descriptive sentence.
The Prompt Formula
Use this formula:
[Subject] + [Key attributes] + [Environment] + [Lighting & camera] + [Quality / style words]
| Element | What to write | Example |
|---|---|---|
| Subject | What the main product or model is | “a matte black wireless gaming mouse” |
| Key attributes | Exact color, material, fit, design details that must stay true | “crisp logo and sharp detailing on buttons” |
| Environment | Studio background or lifestyle setting around the product | “on a seamless pure white studio background” |
| Lighting & camera | Soft studio light, front light, angle, lens type, distance | “lit with softbox studio lighting from both sides” |
| Quality / style words | Final polish keywords | “professional-quality, clean catalog photo, ready for online store” |
This formula works across all use cases — e-commerce product photos, dropshipping catalog images, real estate listing photos, and AI fashion model generation. The more specific your prompt, the less manual correction you need afterward.
Write What to Keep, Not What to Avoid
One of the key AI photo editing strengths in RogerApp.ai — and in AI photo editing generally — is how well the models respond to positive instructions. When editing an existing photo, always use positive forms instead of negations. Don’t write “do not edit the face” — write “keep the face unchanged”. Don’t write “do not change the background” — write “keep the background exactly as it is”. AI models respond significantly better to instructions about what to keep than instructions about what to avoid. This single habit will noticeably improve your editing results across every feature in this tutorial.
This applies especially when writing AI prompts for photo editing in e-commerce and dropshipping workflows — where product accuracy matters. When you need marketplace-ready product photos for Amazon or Shopify, and the product design, label, logo, or model identity must stay unchanged, describe exactly what must be preserved: “keep the product label exactly as it is — same typography, same colors, same layout.” The more precisely you describe what stays, the less the AI changes what it shouldn’t.
Generate New Images
RogerApp.ai’s chat view lets you create entirely new images from text descriptions — no source photo needed. Write your prompt, choose your style settings, and get results in seconds.
AI Fashion Model Generator
Create photorealistic AI models with different looks, ethnicities, body types, and poses — without a model budget. RogerApp.ai’s AI fashion model generator is particularly useful for e-commerce and dropshipping sellers who need lifestyle images at scale: male models, female models, plus-size models, and AI generated swimsuit or bikini models — freely, without the content restrictions found in most mainstream AI tools.
RogerApp.ai’s AI fashion model generator creates photorealistic models for fashion photography, product campaigns, and lifestyle images. Beyond clothing — you can generate models for any product category: beauty, accessories, tech, home goods, or wellness. Place your product in a credible lifestyle situation with a model that fits your brand and target audience, without a single studio booking.
Prompt tips that improve realism:
- Specify lens (35mm / 50mm / 85mm), camera height, and lighting setup
- Specify fabric texture, stitching, and fit
- Specify natural skin texture (avoid the “airbrushed” look)
- Specify “each hair strand individually visible” (including eyebrows and eyelashes) for hyper-realism
Example prompt:
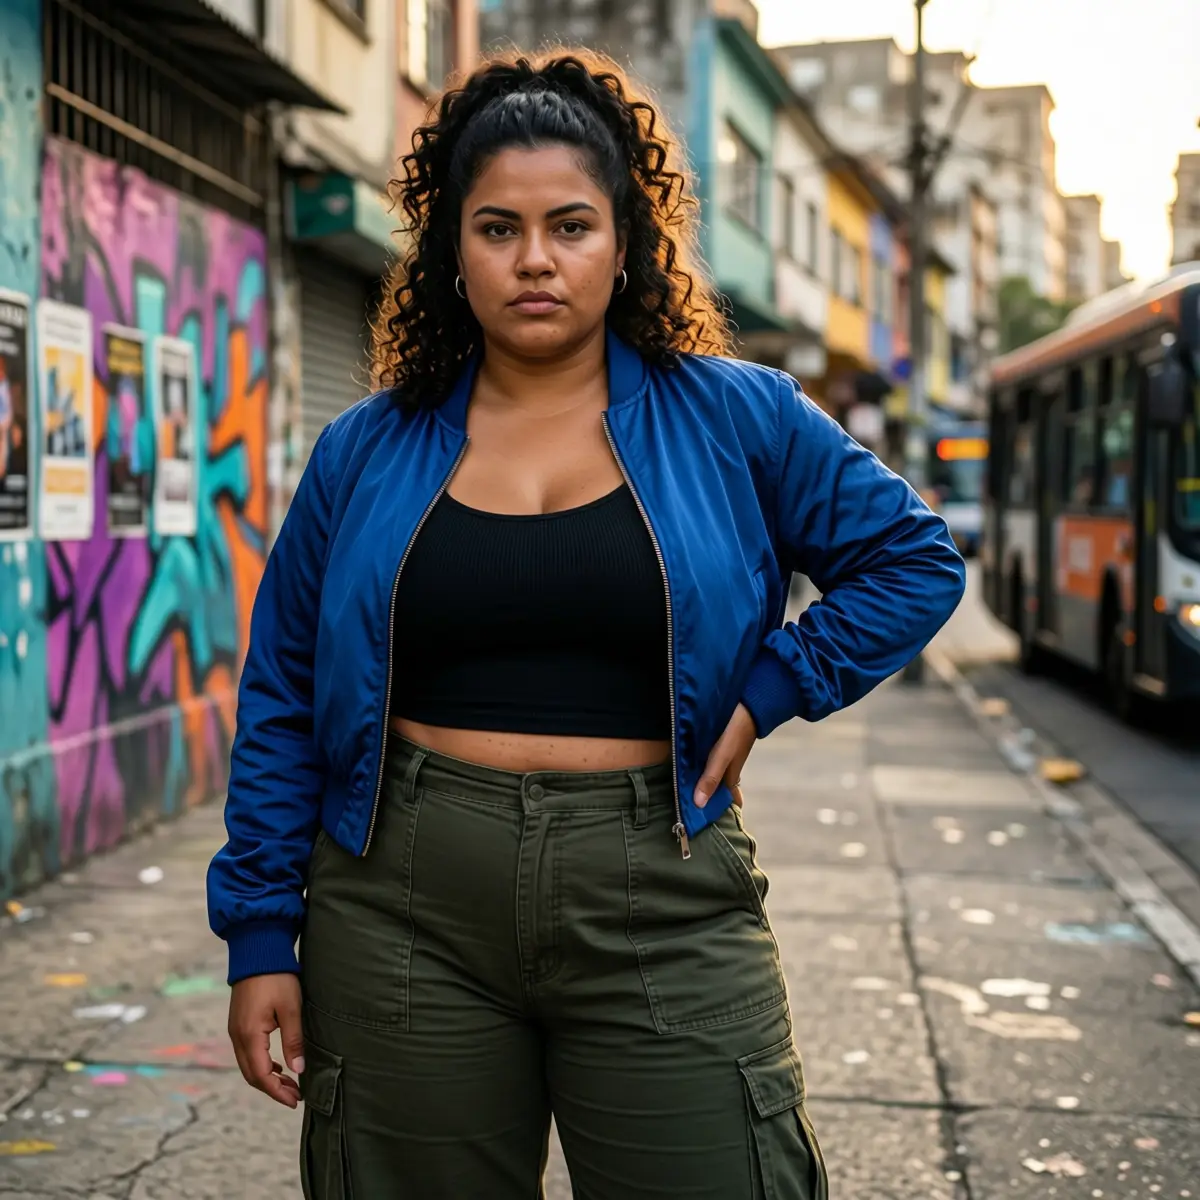
[Subject] Plus-size Brazilian woman in her late 20s with round face, curly shoulder-length dark hair in a half-up style with each hair individually visible, warm medium-brown skin with visible texture, wearing a cropped cobalt blue bomber jacket, fitted black ribbed tank top and high-waisted wide-leg cargo trousers in deep olive with a thick waistband, standing confidently with one hip popped, hand resting on hip, the facial expression is strict and determined.
[Key attributes] Bomber jacket in slightly shiny nylon with subtle crinkling at elbows and hem, tonal ribbed cuffs, chunky zipper with metal pull; tank top showing fine rib knit hugging curves naturally, trousers with large patch pockets, visible stitching and slight pulling of fabric around hips and thighs; subtle stretch marks visible at side of exposed midriff, soft skin folds where waistband meets stomach, natural sheen of skin on arms and collarbones.
[Environment] São Paulo side street with colourful but slightly worn low-rise buildings in the background, walls with layered posters and tasteful abstract graffiti in magenta, teal and orange, blurred passing bus hinting at city hustle, concrete pavement with cracks and small paint splatters, no cars or obvious branding in foreground.
[Lighting & camera] Late afternoon golden light coming from camera right, casting warm highlights on bomber jacket and hair, soft fill from the sky on shadow side, 35mm lens at slightly low angle to emphasise confidence and presence, mid-length framing from head to mid-shin with moderate depth of field keeping some background detail readable.
[Quality / style words] Photorealistic, hyperdetailed, 8k, bold streetwear fashion editorial, vibrant Brazilian city palette with cobalt and olive contrast, body-positive and powerful, designed as a high-impact social campaign visual.
Generate Backgrounds
You can generate custom product backgrounds in two ways:
Write your own background prompts:
Describe the mood, location, surfaces and lighting you want for your product.
Example: “Daylight studio with soft shadows, matte stone tabletop, blurred living room in the background, neutral beige walls, professional-quality product photoshoot style.”
RogerApp.ai generates the background photo and you keep refining until it looks right.
Use ChatGPT to help you write background prompts:
If you don’t know how to describe the background, you can ask ChatGPT to generate detailed background prompts for your product category (beauty, electronics, kitchen, real estate, etc.). Copy the prompt into RogerApp.ai to generate the background photo.
Reuse backgrounds from photos you already have:
Use Auto-Masking or Manual Masking to remove the product from an existing photo. Save that background as a clean background photo. Reuse that same background for multiple products so your store looks consistent.
Once your background is ready, see AI Image Merger to combine it with your product photo.
No Unnecessary Censorship
Unlike the current market-leading AI photo tools, RogerApp.ai doesn’t have unnecessary censorship. Users can undress their AI models or change their garments freely, create bikini and lingerie product photos, or produce horror and artistic imagery without artificial content restrictions.
This makes RogerApp.ai the practical choice for lingerie e-commerce stores, swimwear dropshipping catalogs, and artistic editorial photography — any workflow where mainstream tools add restrictions that don’t serve legitimate business needs. AI generated bikini models and AI generated swimsuit models can be created freely and used directly in your store.
How to Edit Photos with AI — Prompts, Masking & Precision Tools
Edit Your Photos
The Photo Editor is where the most professional AI photo editing workflows happen. Whether you have a real photograph, a supplier image, a real estate listing photo, or an image created with another AI tool — you can edit it here. One important difference from non-business tools: you can edit photos as many times as needed without degradation.
At the top-right, you’ll see two main tabs: Mask & Edit and Create New Version.
Mask & Edit tab:
- Main photo — your image to edit
- Reference photos (optional) — helpful for merging a background, model, prop, or style
- Object to find — used for Auto-Masking (example: “hair”, “shoes”, “background”)
- Manual — opens the brush tool
- Requested Change — your edit prompt
Practical rule (saves time): Start with one reference image at a time. Multiple small edits are usually easier than merging three images in one go — especially early on.
Create New Version tab:
- Use a reference image to generate a new, original image with a similar composition or style
- Style options (cartoon, line drawing, etc.)
- Lighting and camera controls
- One-click background removal button
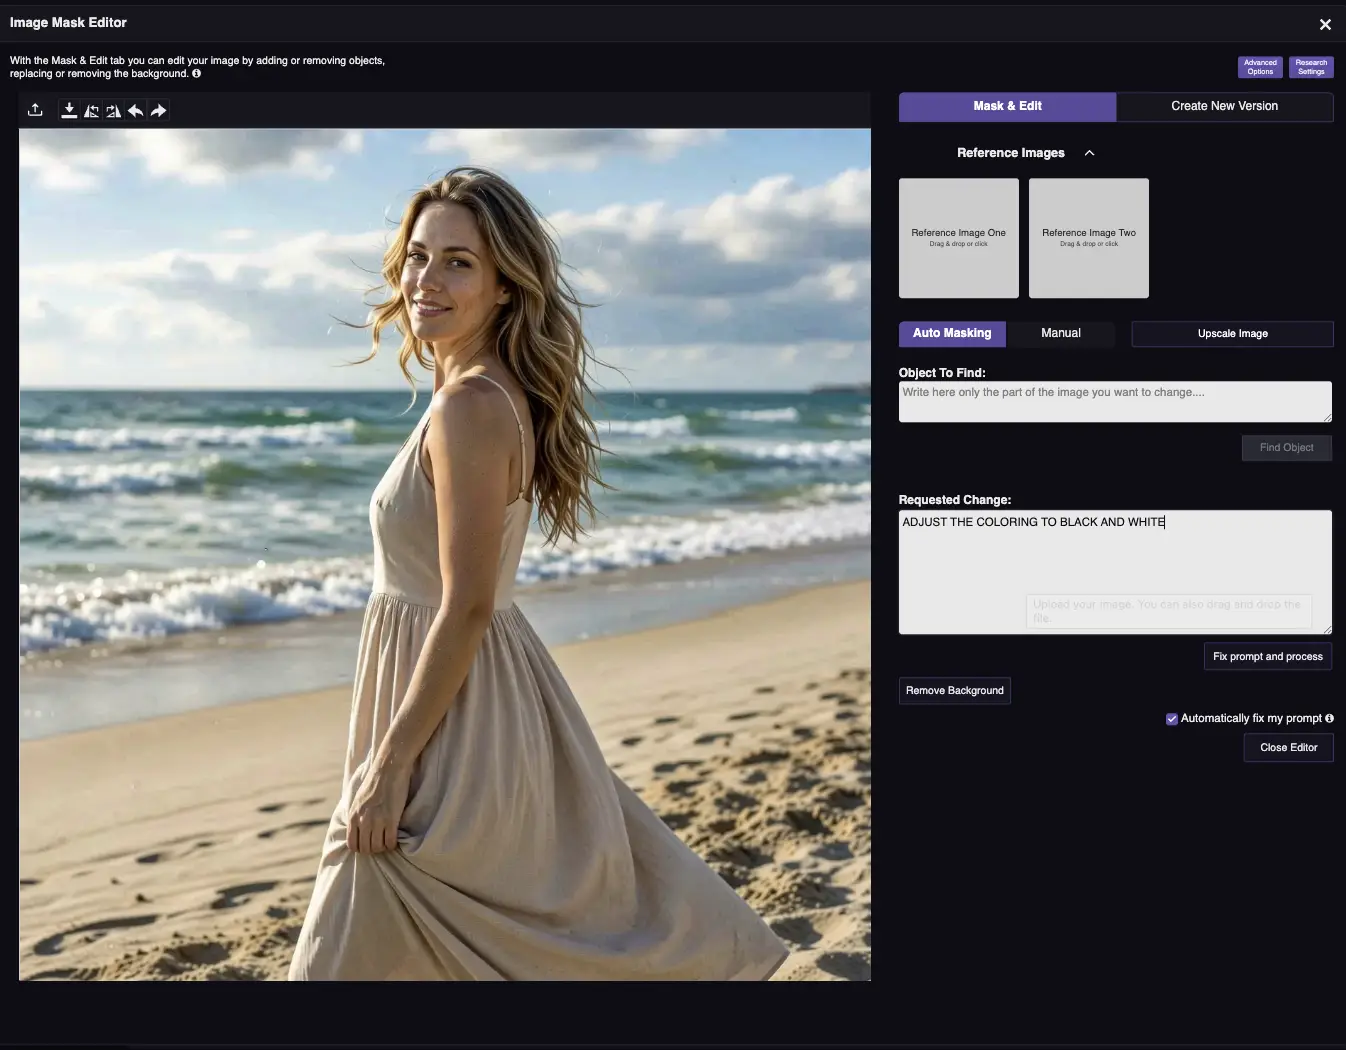
Edit Photos with AI Text Commands
Method: Text prompt in editor
The simplest way to edit: describe what you want to change in the “Requested Change” box. RogerApp.ai understands 100+ languages, so you can write AI prompts for photo editing in your native language and get professional results regardless of your technical background.
How it works:
- Upload your photo to the editor
- Write what you want to change in the “Requested Change” field
- The AI reads your photo and applies the changes
Example prompts for editing:
- “Change the background to a modern kitchen”
- “Make the lighting warmer and add soft shadows”
- “Remove the text from the t-shirt”
Pro tip: If you want to create a new image where you only use some parts of your starting photo, write the prompt in the form of: “Create new image of the woman in the main photo…” Always describe what needs to be edited and what part of the image you don’t want to change.

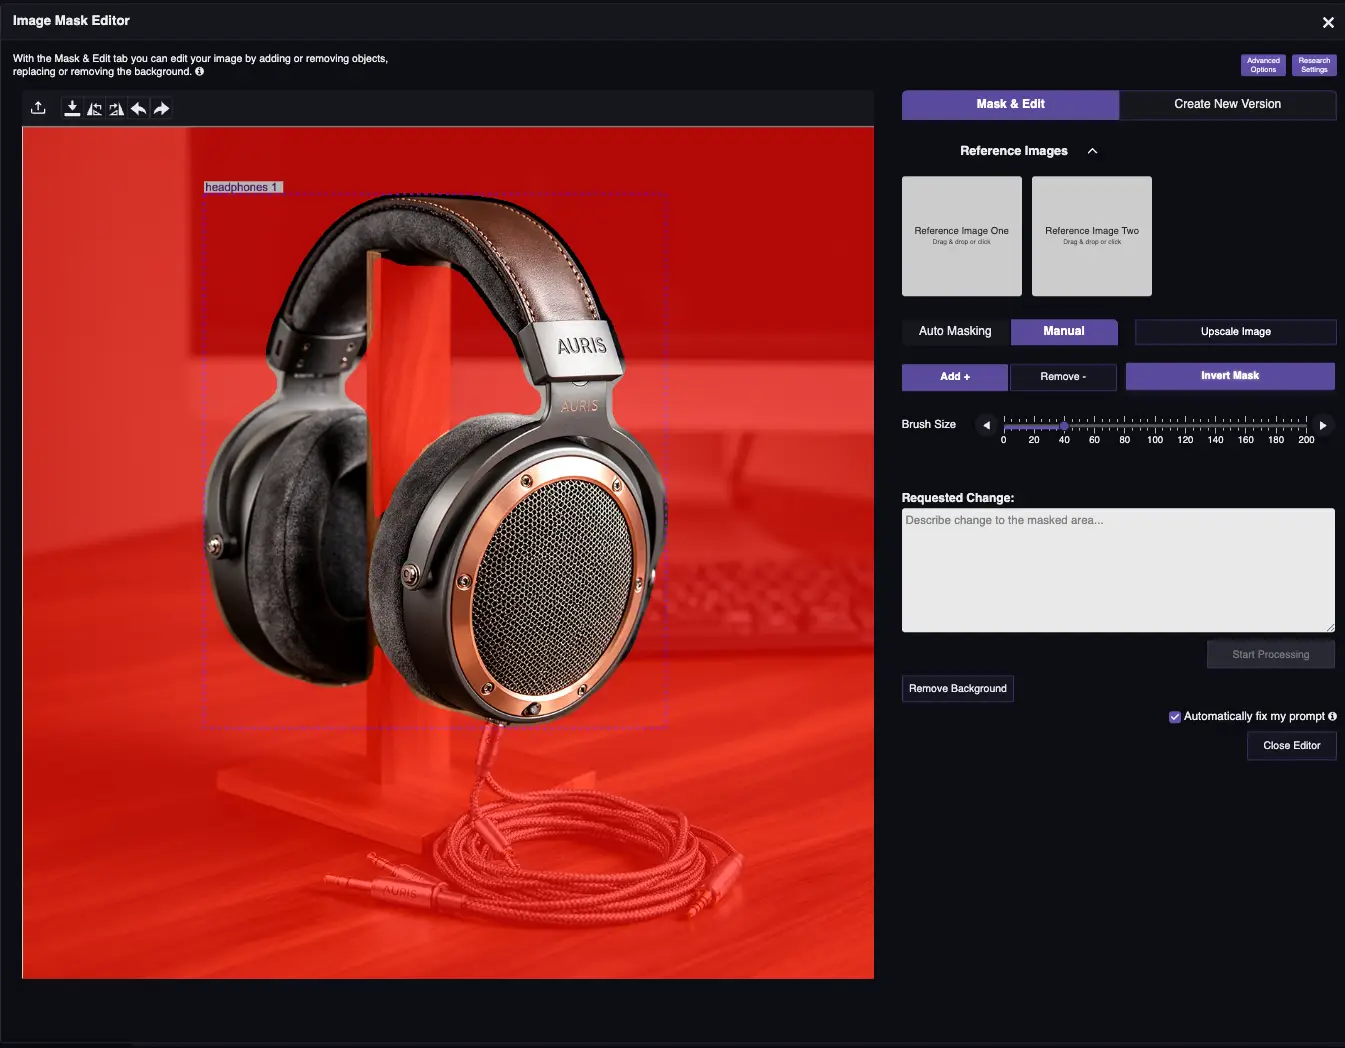
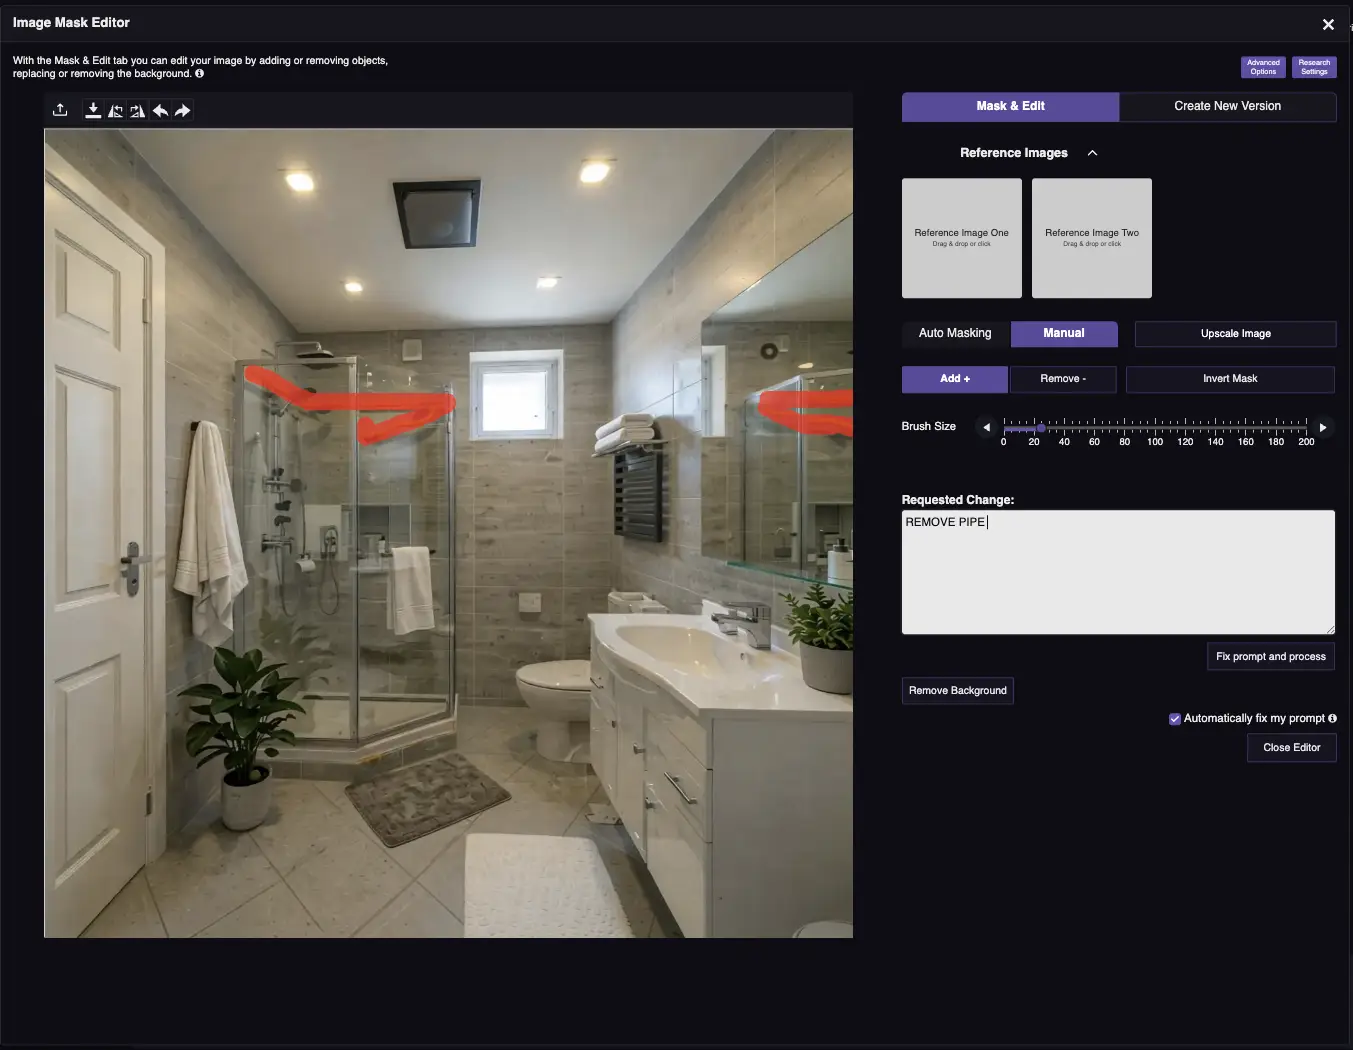
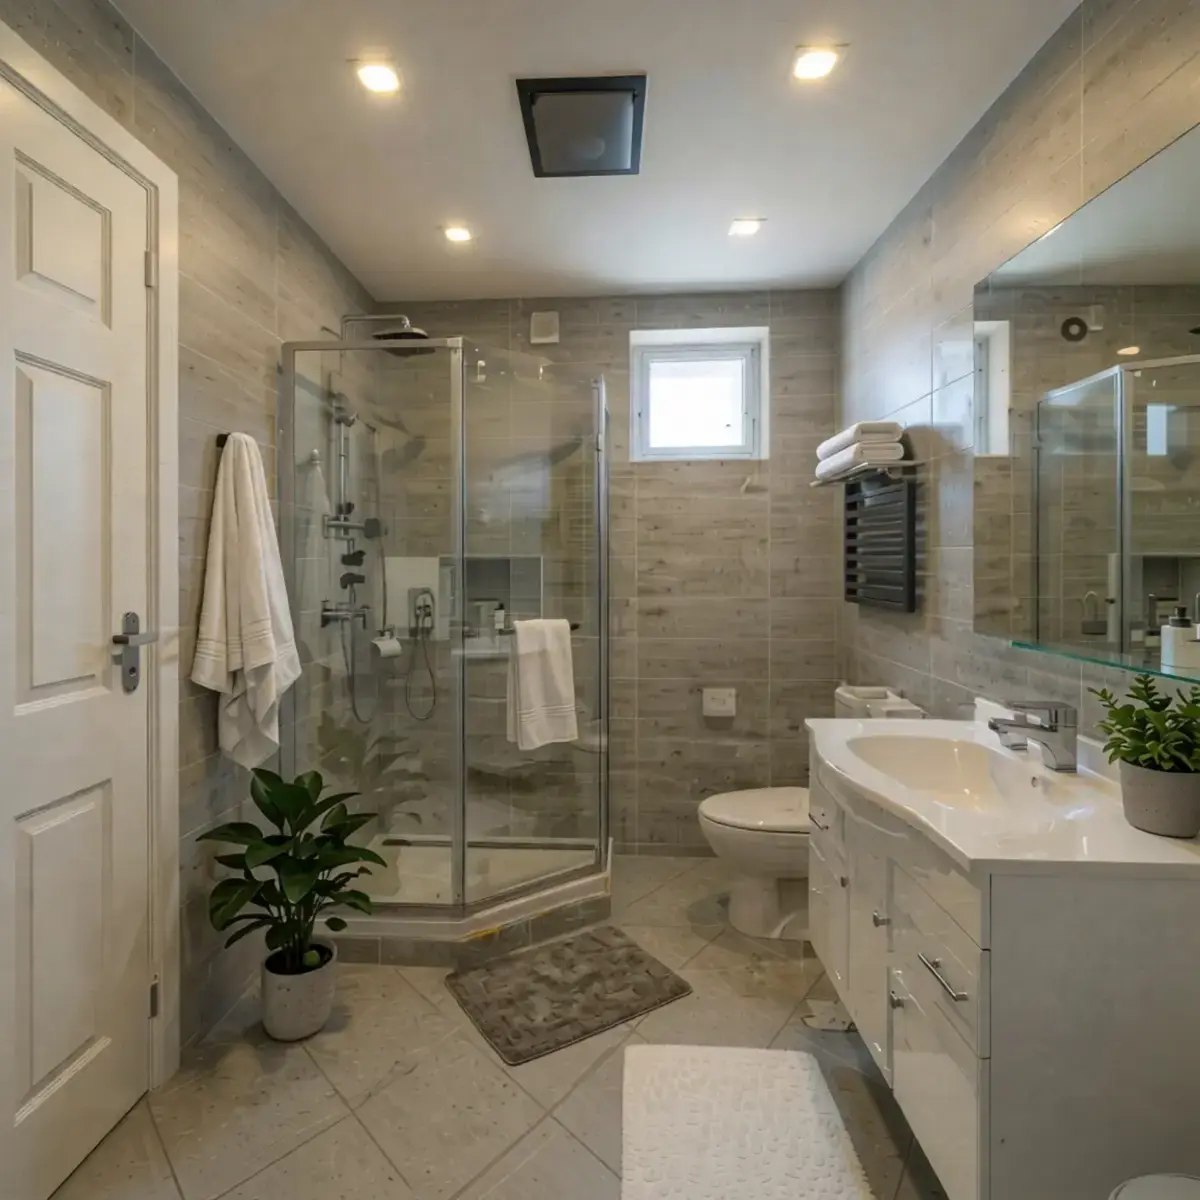
Select Exactly What to Edit — Manual Masking
Method: Image + brush tool + prompt
Manual Masking is an incredibly useful functionality for very specific edits. You can choose the brush size and simply paint the area you want to edit.
When Manual Masking is most useful:
- Finishing photo details with precision
- Correcting Auto-Mask when it selects the wrong area or wrong size
- When auto-mask doesn’t fit your changes — go back and manually mask the area where you want to fit the changes
- Keeping a face identical while changing clothes (mask only the clothes, not the face)
Example: Put the harness on the dog. Using manual masking, the changes only happen inside the masked area.

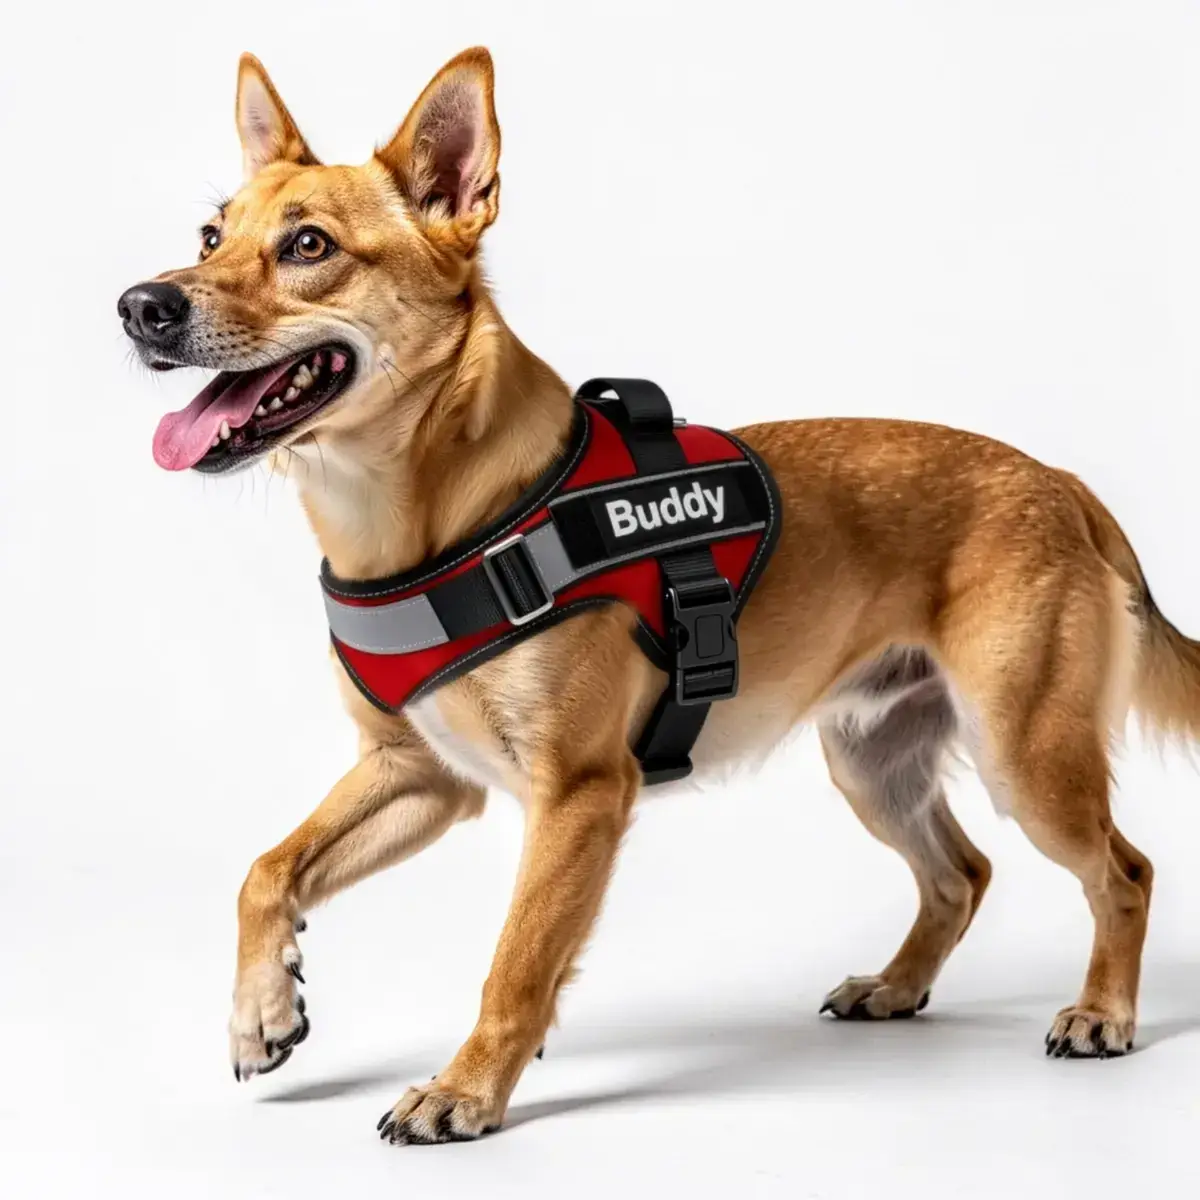
When to use Manual Masking for character consistency: If you want the same model wearing multiple outfits, mask only the clothing areas and leave the face unmasked. The AI won’t regenerate the face, keeping it identical across all variations while only changing the garments.
Let AI Find What to Edit — Auto-Masking
Method: Image + object name + prompt
Type the object name in the “Object to find” field and the AI finds and masks it automatically.
Can be left empty most of the time — the tool can mask automatically when needed based on your text prompt. But for very specific edits, Auto-Masking is incredibly useful.
Best use case: Changing hair color when you want to keep the hairstyle exactly the same. Type “hair” in Object to find, then describe the color change in the prompt.
How the system works behind the scenes: RogerApp.ai automatically adds masking based on your text prompt for best results. Sometimes the auto-mask ends up being the wrong size and your changes don’t fit. In that case, go back and use Manual Masking to adjust.

Protect What Must Not Change — Reverse Mask
Method: Image + mask + prompt
Reverse Mask is the “do not touch this” switch — best used when simple auto-masking isn’t a suitable option and manual masking would require a lot of precision or time.
Use it when:
- Your product must stay pixel-consistent
- You want to change everything around the product (background, surface, lighting)
Steps:
- Upload your image
- Mask what you want to protect (usually the product)
- Toggle Reverse Mask
- Prompt what you want to change outside the protected area
Example prompt:
“Replace the background with a minimalist beige studio wall and a soft shadow gradient; keep the protected product completely unchanged.”
Pro tip: If the product changes anyway — tighten the mask edges and add “keep product unchanged: size, orientation, label text, colors” to your prompt.
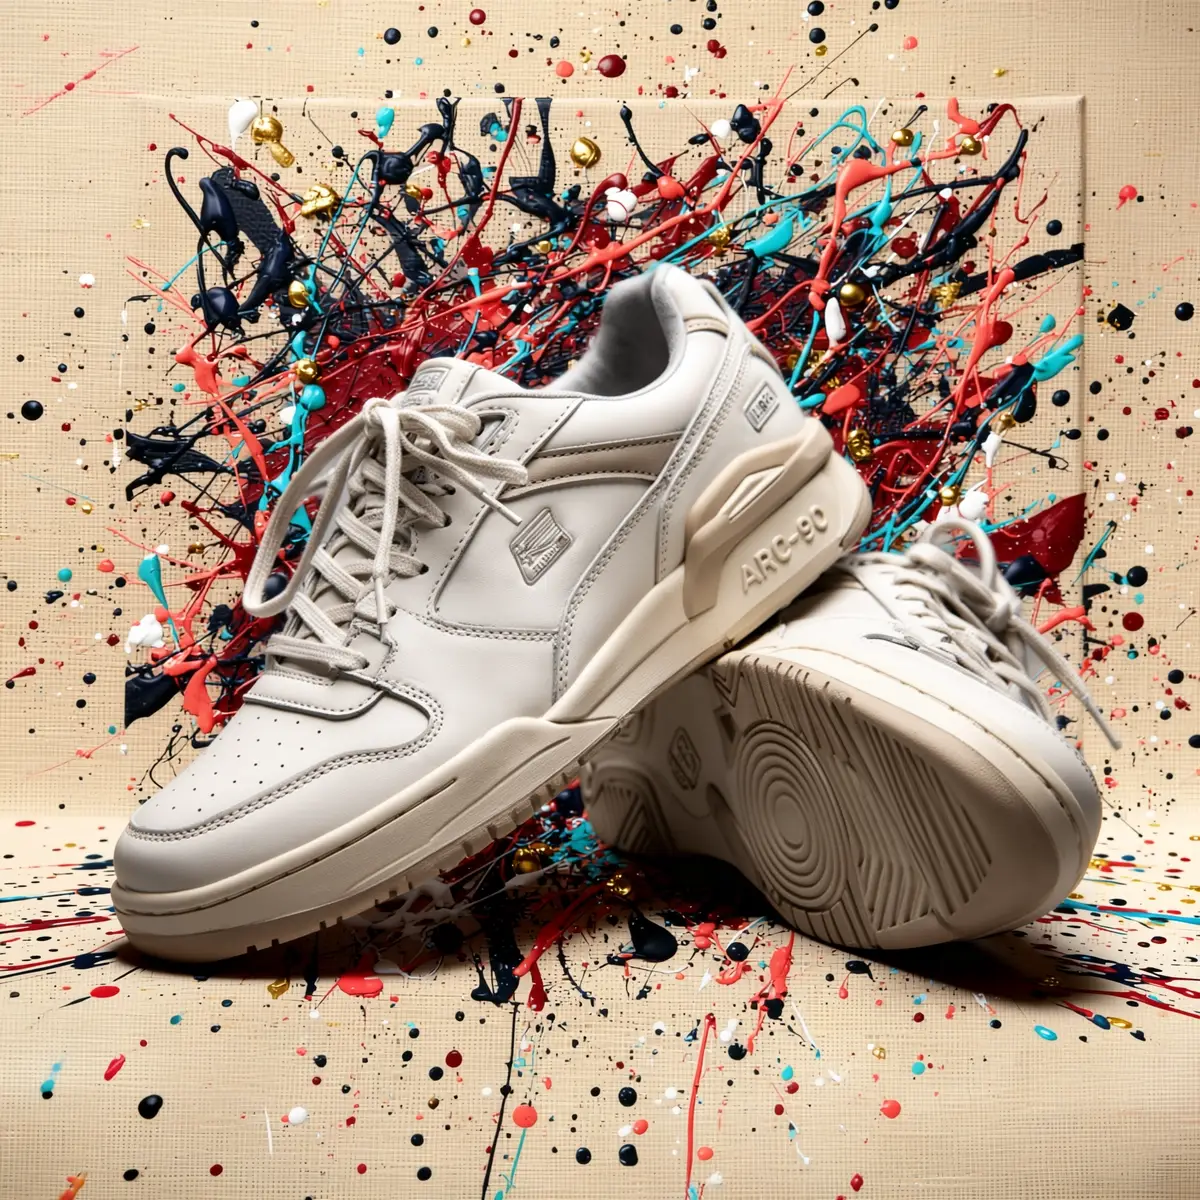
AI Background Removal — Remove, Replace & Merge
Background Removal & Change
Method: One-click button OR image + mask + prompt
RogerApp.ai is a reliable background remover AI that goes further than one-click removal. For quick removal, the one-click button handles most cases. For professional e-commerce results — where the product must sit naturally in a new environment — the merge method gives full control. Whether you need to remove a white background in AI or replace a cluttered supplier photo background entirely, both approaches are covered here.
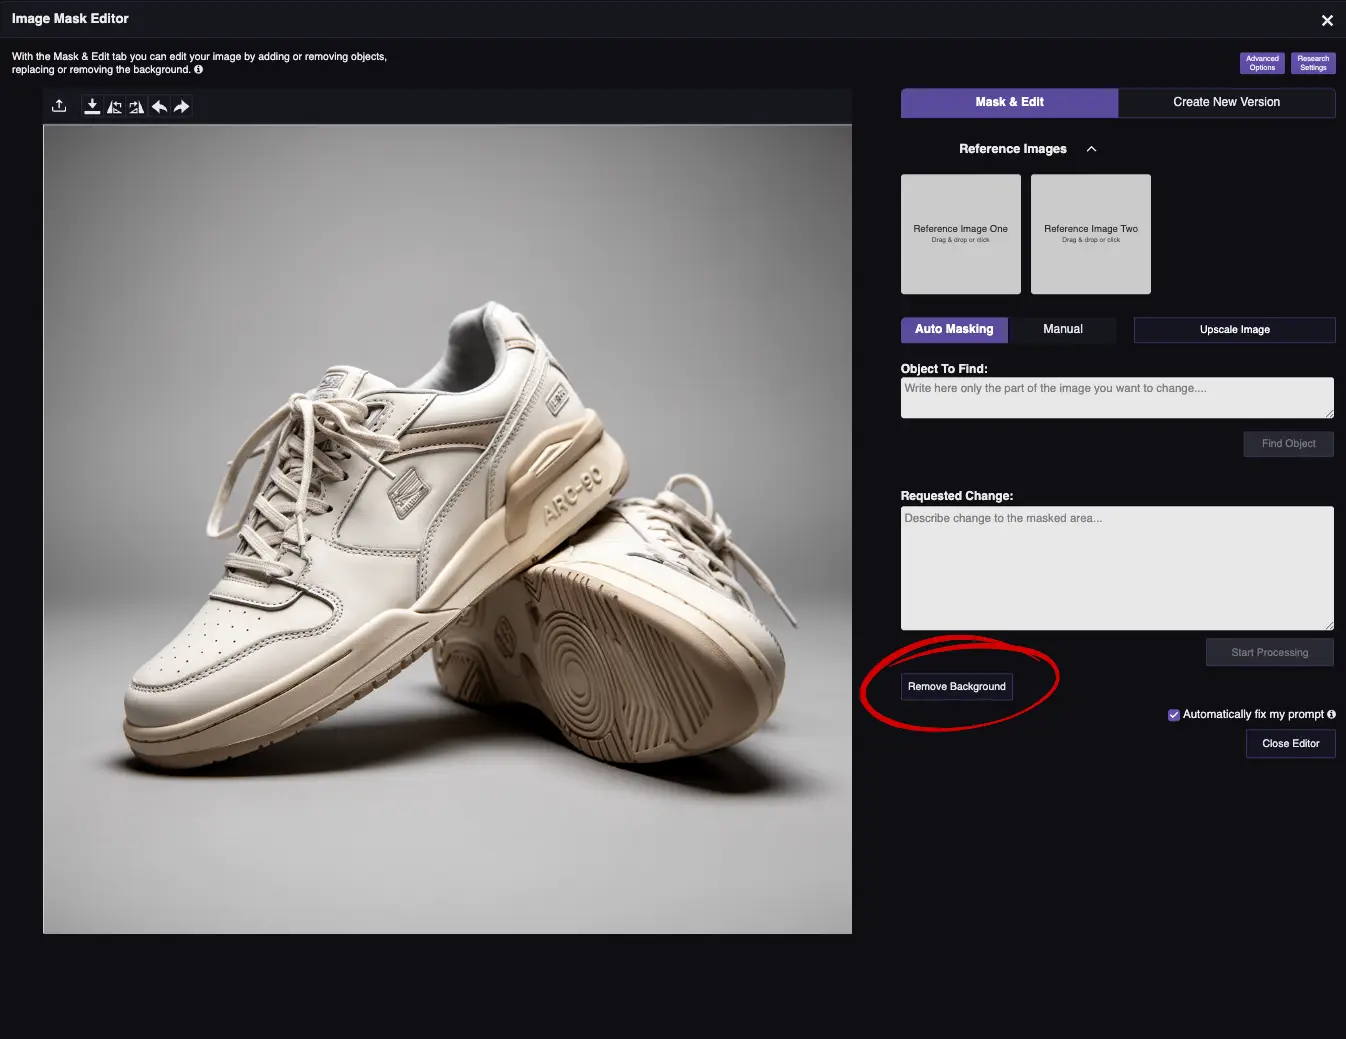
Two approaches:
Quick removal — One-click button: use the background removal button for instant removal.
Method 1: Generate + Merge (maximum control)
Best when you want a specific background and precise product placement.
- Generate or prepare your background image (see Generate Backgrounds)
- Upload both your product photo and background to the editor
- Use AI Image Merger to combine them
- Choose your masking approach:
- Text prompt only — works for most photos
- Auto-Mask — let AI find the product automatically
- Manual Mask — paint exactly around the product for maximum control
- Reverse Mask — protect the product, let AI blend everything else
Method 2: Direct prompt in editor
Simpler approach when you don’t need a specific reference background.
- Upload your photo to the editor
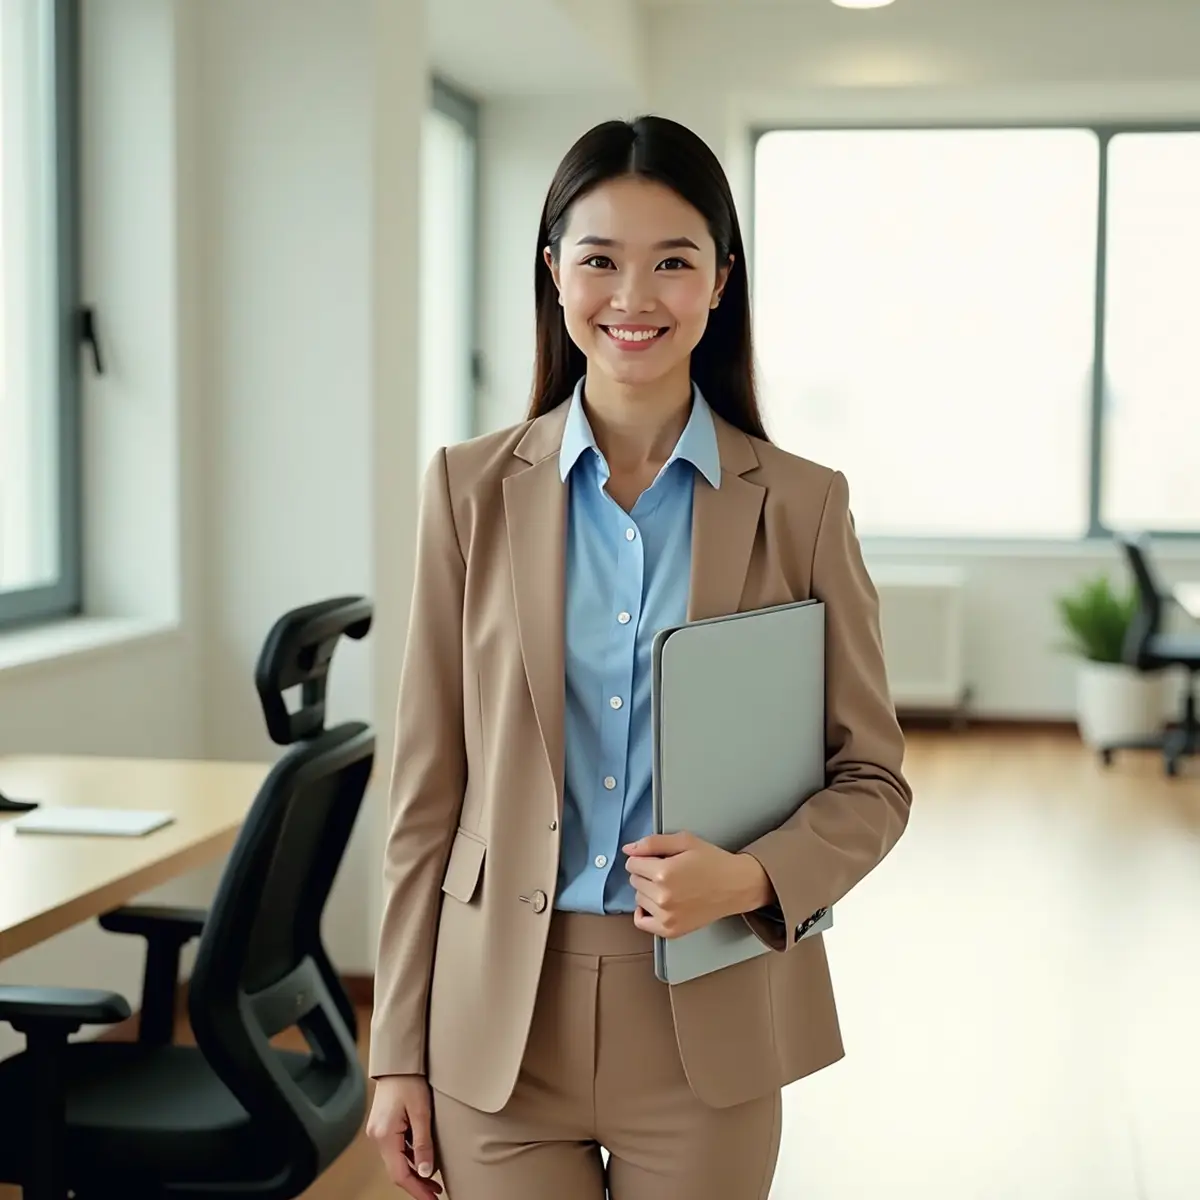
- Write your prompt: “Change the background to a modern office desk with soft natural lighting”
- The AI automatically masks and replaces the background
- Optionally use Manual Mask or Auto-Mask for more precision
Pro tip: For the cleanest results on important product photos, Method 1 (Generate + Merge) gives you the most control. For quick social media edits, Method 2 is faster.
AI Image Merger, Super Resolution & Object Editing
AI Image Merger — Combine Up to 3 Photos
Method: Image + reference image(s) + prompt
The AI image merger lets you combine up to 3 images — real photos and AI-generated ones. Whether you need to merge two images into one product shot, place a model into a new background, or combine a product with a lifestyle scene — RogerApp.ai matches perspective, lighting, and style so the result looks like it was originally photographed that way. It is one of the most reliable ways to merge images with AI and get results that are ready for professional use. Note: the tutorial includes merge examples in the Select Exactly What to Edit — Manual Masking and Protect What Must Not Change — Reverse Mask sections — both are worth reading before working on complex merges.
Upload your main photo and one or two reference photos, then describe how they should combine.
Merge workflow:
Once your product photo and background photo are ready, use RogerApp.ai to merge them together:
- Auto-Masking — let the tool find the product automatically
- Manual Masking — paint exactly around the product for maximum control
- Simple Text Prompt — in the majority of photos, simple text prompts are enough for professional-quality results
Pro tip: Start with one reference photo at a time. Making multiple edits is often easier than merging three images together in one go.
Example prompts:
Merge: Product + Background:
Professional skincare product photo using the uploaded serum bottle photo as the main product and the uploaded reference photo as the bathroom lifestyle background, the bottle shape, glass color, label layout, typography and logo colors must stay exactly the same as in the product photo, the tiles, decor, props and overall color palette must stay exactly the same as in the background reference photo, the bottle stands upright on the same surface with a soft natural reflection, lit with diffused daylight from the side and a subtle top highlight on the glass, shot as a close-up product photo on a short telephoto lens, professional-quality, clean premium skincare advertising style, ready for e-commerce product page.
Merge: Product + Model:
Professional e-commerce lingerie photo using the uploaded lingerie product photo as the main product and the uploaded reference photo as the model and bedroom background, the bra and panties must stay exactly the same design, lace pattern, color and fit as in the product photo, the model’s face, body type, hairstyle and [ethnicity: Latina] must stay exactly the same as in the reference photo, she is standing naturally in the same room shown in the reference photo, soft flattering bedroom-style lighting with gentle side light and front fill for smooth skin tones, shot on a 50mm lens at mid-distance, professional-quality, tasteful commercial lingerie catalogue style, ready for online store product page.
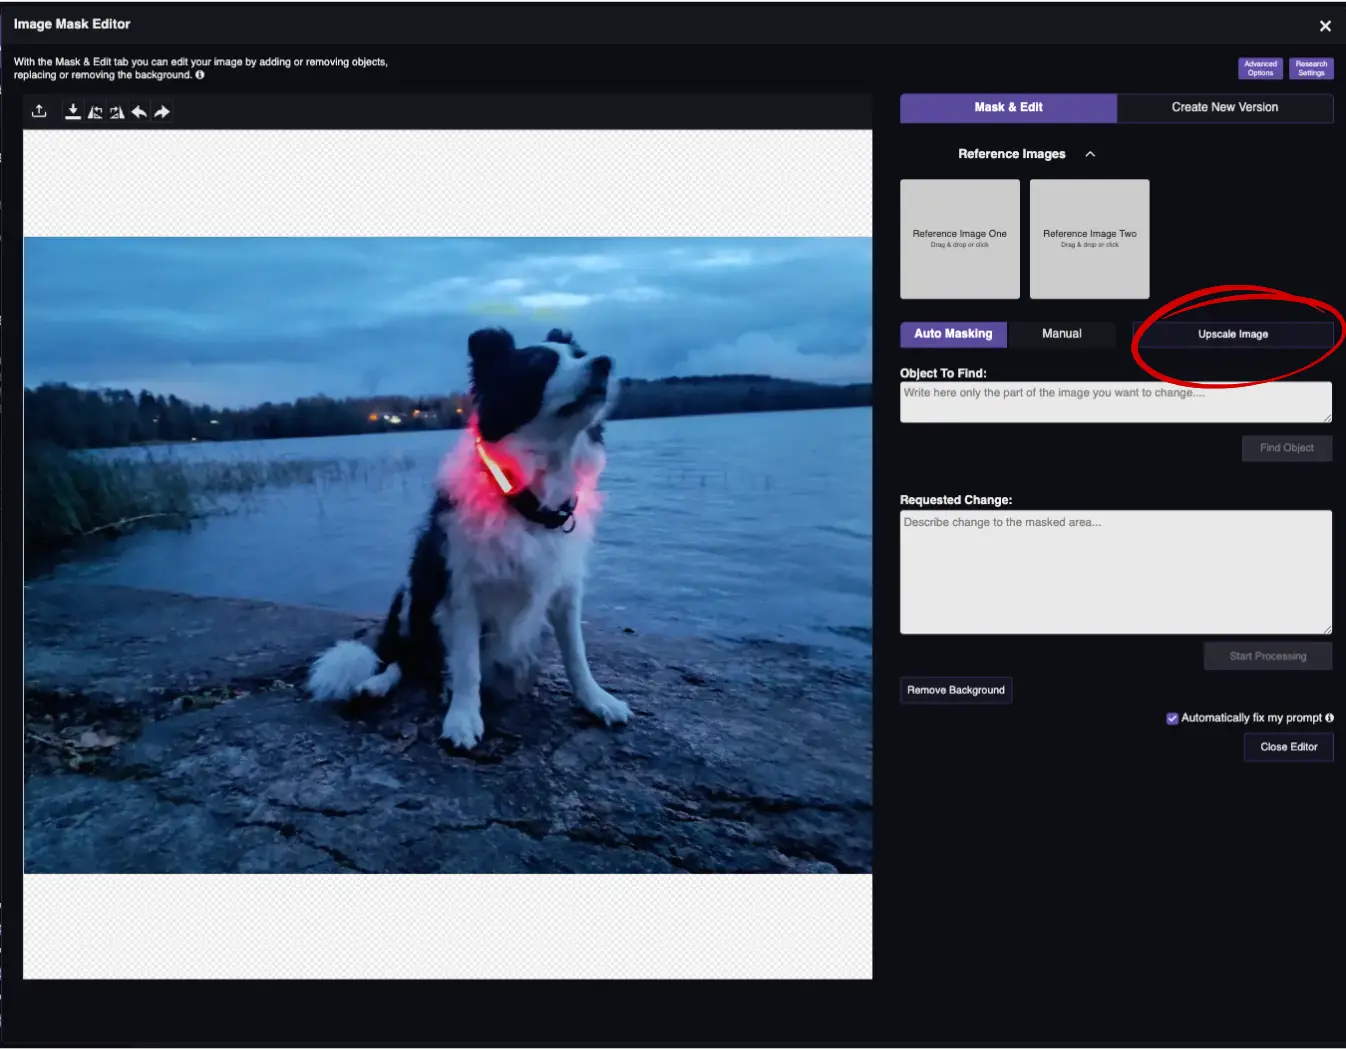
Best AI Image Upscaler — Super Resolution
Method: Image + one click
Use the best AI image upscaler in RogerApp.ai to increase resolution up to 2400×2400 pixels before further editing. Upscaling gives the AI more detail to work with and makes the final result suitable for professional e-commerce and dropshipping use. Whether you need a free AI image upscaler for a quick product fix or a reliable solution for your entire catalog, Super Resolution handles both.
- Your product stays the same
- The photo becomes clearer, more detailed, and more suitable for professional use
- You can redo the upscale until you’re happy with the result
Pro tip: Upscale your product photo BEFORE merging it with a background. The extra detail gives the AI more to work with and produces a cleaner merge.

Change Any Part of Your Photo — Objects, People, Props and Details
Method: Via masking tools + prompt
Remove, replace, or add any element to a photo with precision AI masking — objects, people, props, background details, or small finishing touches.
How to remove objects:
- Use Manual Masking or Auto-Masking to select the element
- Prompt: “Remove the [object]” or “Clean background where the object was”
You can use this feature to remove a person from a photo, clean up supplier images that contain watermarks, or remove props and background clutter that don’t belong in your product photo.
How to replace objects:
- Mask the element you want to replace
- Describe the replacement in your prompt
How to add objects:
- Use Merge Images with a reference photo of the object you want to add, OR
- Mask the area where the object should appear and describe it in your prompt
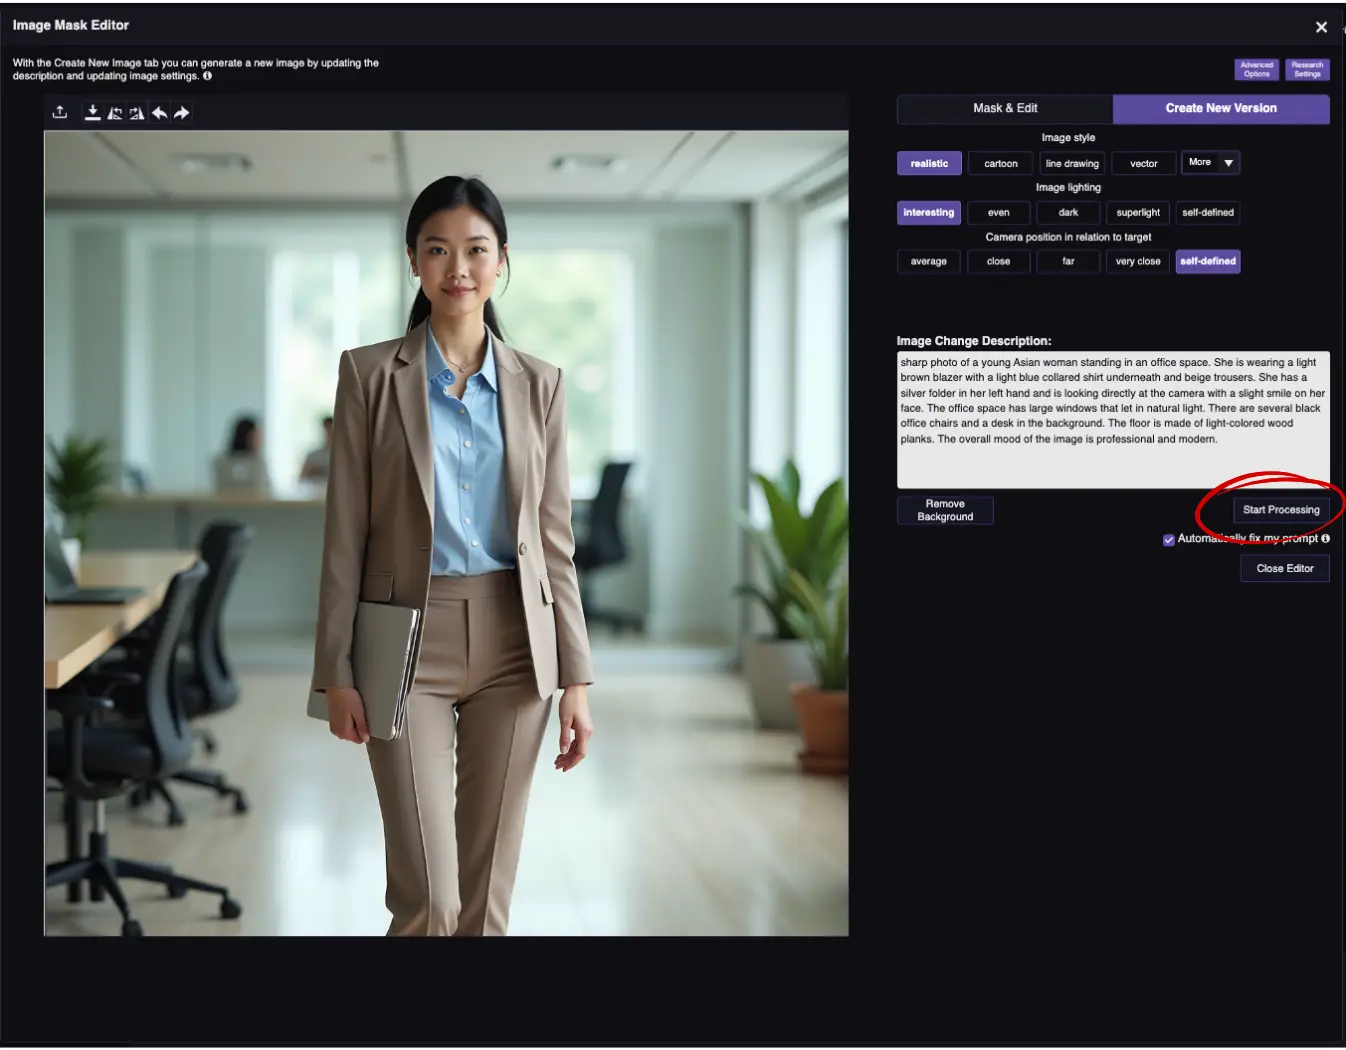
Use Any Photo as Inspiration — Create an Original You Own
Method: Image + prompt
One of RogerApp.ai’s unique functionalities is its ability to read the content of the photo you upload. From the “Create New Version” tab, you can create a similar photo while gaining full ownership of the new image simply by choosing “Start processing”.
Any photo can serve as creative inspiration — a composition you admire, a lighting style you want to match, or a classic image whose copyright has expired. RogerApp.ai creates an entirely original image that you fully own and can use commercially without restrictions.
Use case: You find an inspiring product photo online but can’t use it due to copyright. Upload it as a reference, and RogerApp.ai creates an original version that is yours.
AI Style Transfer — Transform Photos Into Cartoon, Line Drawing, Vector & More
Method: Image + style selection or prompt
Use AI style transfer to transform any photo into a completely different visual style. Turn a product photo into a cartoon styled image, a clean line drawing, a vector illustration, or a magazine editorial look — all from the same source photo. You can also re-define the lighting and camera angle from the Create New Version tab.
Available styles include:
- Cartoon
- Line drawing
- Sketch
- Caricature
- 3D model
- Anime
- Logo style
- Comics
- Manga
- Vector
- Editorial / magazine
Each style works on any photo — turn a product photo into a cartoon, transform a real estate interior into a sketch, or convert a portrait into an anime illustration. These features work directly with a text prompt in the editor — no masking needed in most cases.
Quick AI Photo Enhancements — Color, Lighting & Perspective
Fix and Upgrade Lighting — Fix Overexposed Photos & Change Mood
Method: Text prompt in editor
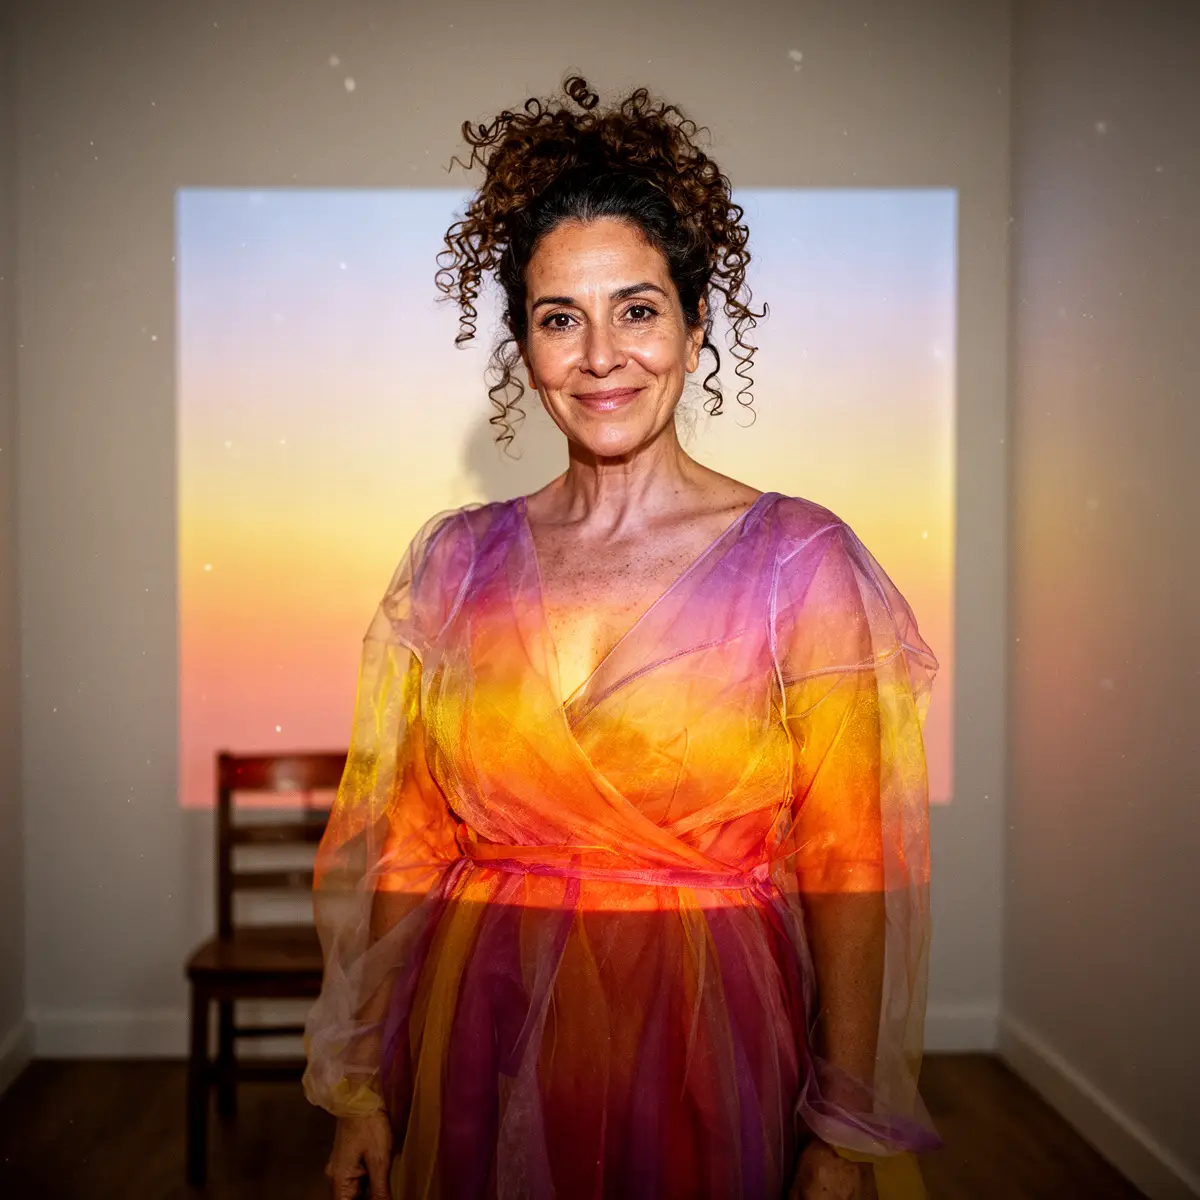
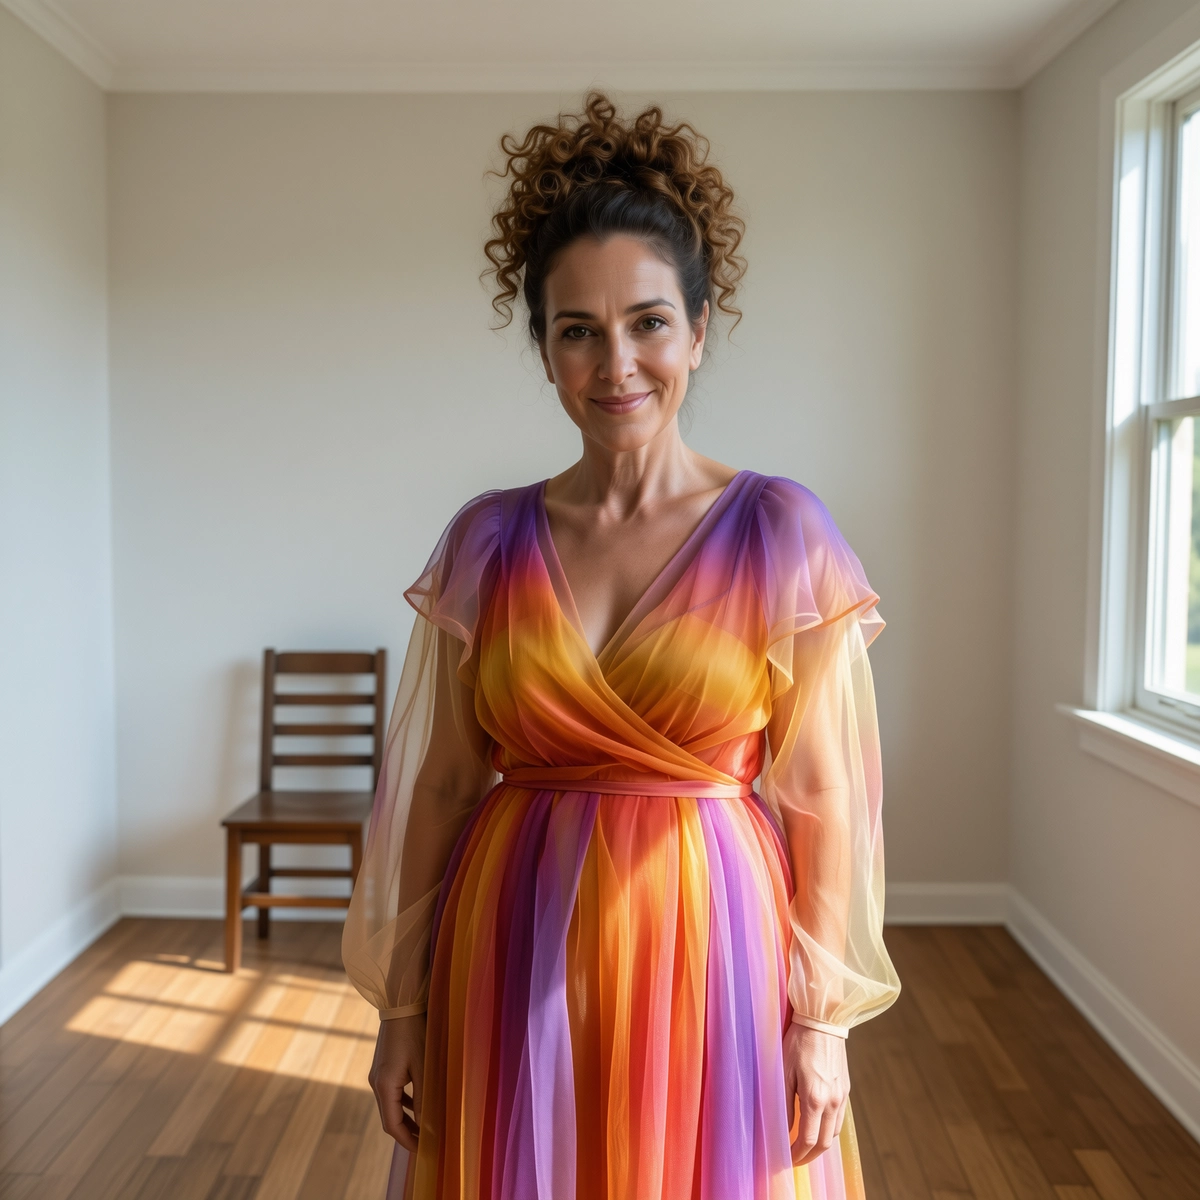
Enhance lighting, fix overexposed photos, and change the mood of any image with a simple text command. Whether you need to fix an overexposed photo online or transform flat midday light into a warm golden hour feel, RogerApp.ai handles it without touching the rest of the image.
Example prompts:
- “Fix the overexposed areas and balance the exposure across the full image”
- “Improve the lighting, add soft studio lighting from both sides”
- “Fix the dark shadows and make the exposure more even”
- “Change the lighting to warm golden hour, late afternoon sun from the right”
AI Image Recolor & Color Correction
Method: Text prompt in editor
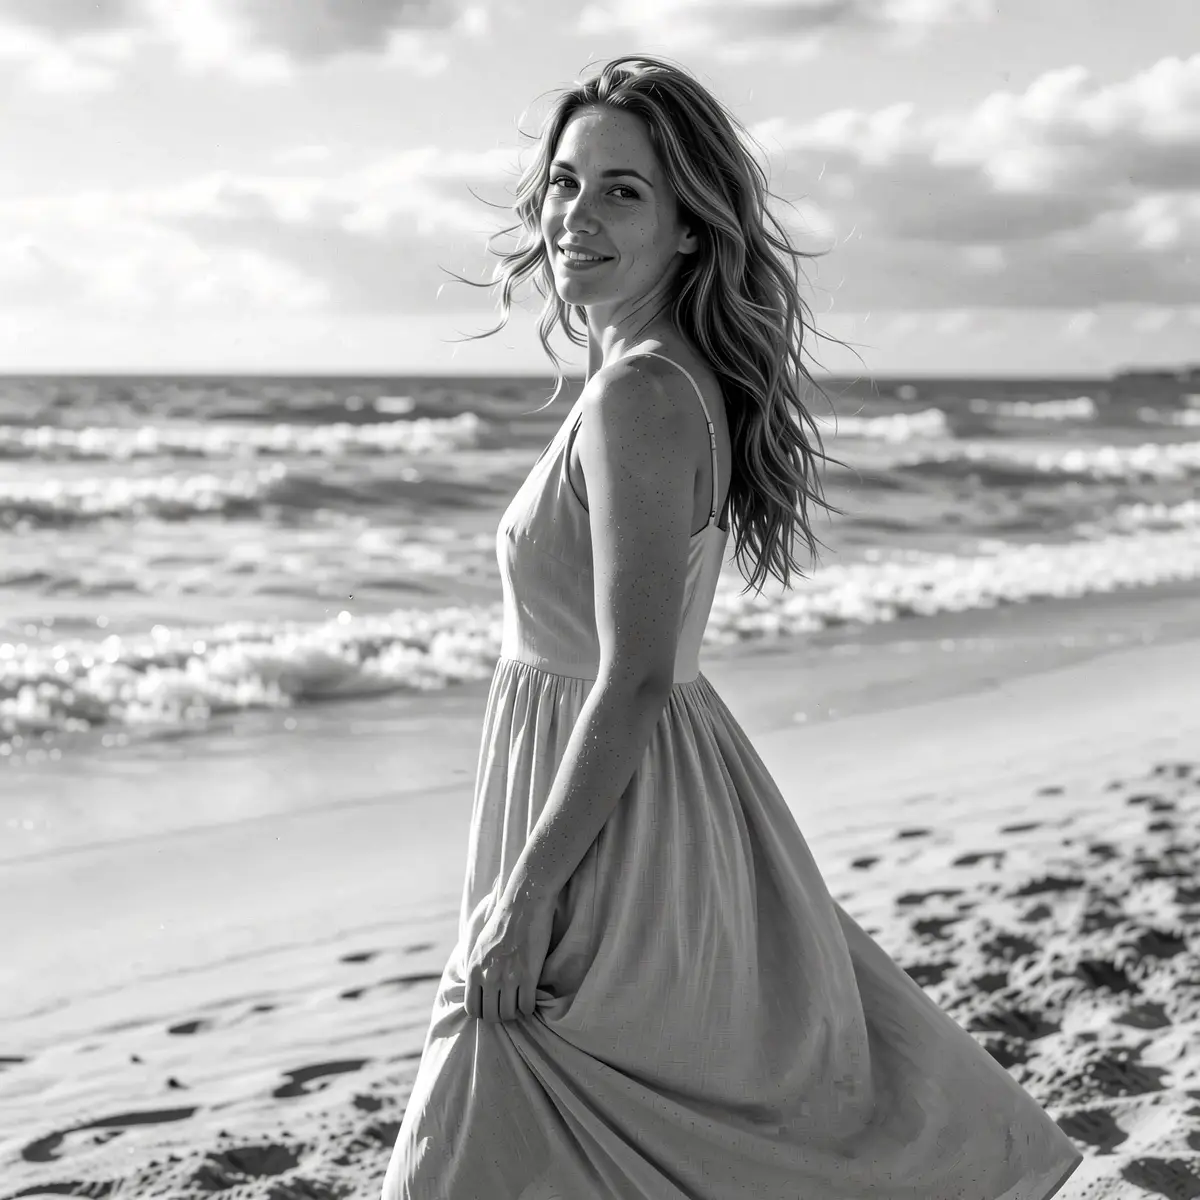
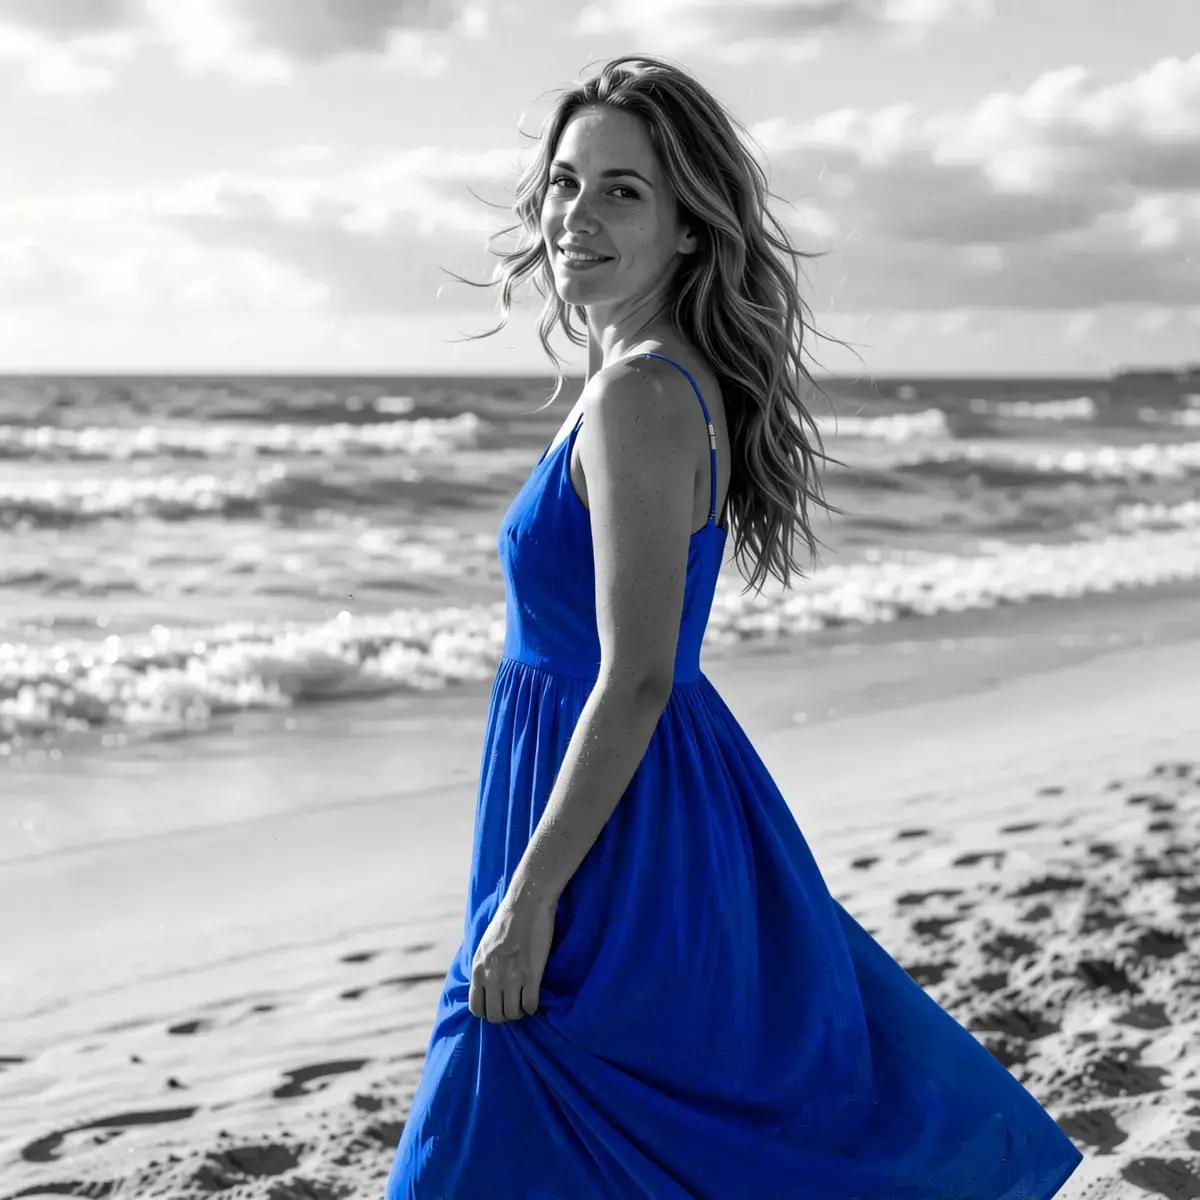
Use AI image recolor to change the color of any element in your photo — clothing, products, backgrounds, or accessories — with a simple text prompt. RogerApp.ai handles everything from minor white balance fixes and AI photo color correction to complete palette changes and single-item color swaps without affecting the rest of the image.
Example prompts:
- “Recolor the jacket from black to deep forest green”
- “Change the shirt color to cobalt blue”
- “Fix the white balance, the image is too yellow”
- “Make the colors more vibrant and saturated”
- “Recolor the product from white to matte black”
Recoloring is especially useful for e-commerce sellers who need to show a product in multiple color variants without reshooting — change shirt color in photo, recolor a bag, or update a product to match a new season’s palette. One source photo, multiple color options.
Change Camera Angle, Perspective or Product Orientation with AI
Method: Text prompt in editor
Change the AI camera angle, rotate products, or shift perspective with a text command. No 3D software needed — describe the viewpoint you want and RogerApp.ai adjusts the image.
Example prompts:
- “Show this product from a 45-degree angle”
- “Change to a top-down flat lay perspective”
- “Show the product from a low angle, looking up”
- “Rotate the bag 90 degrees to show the side panel”
You can also use the “New Version” tab and select from the given camera angle options, then choose “Start processing”.
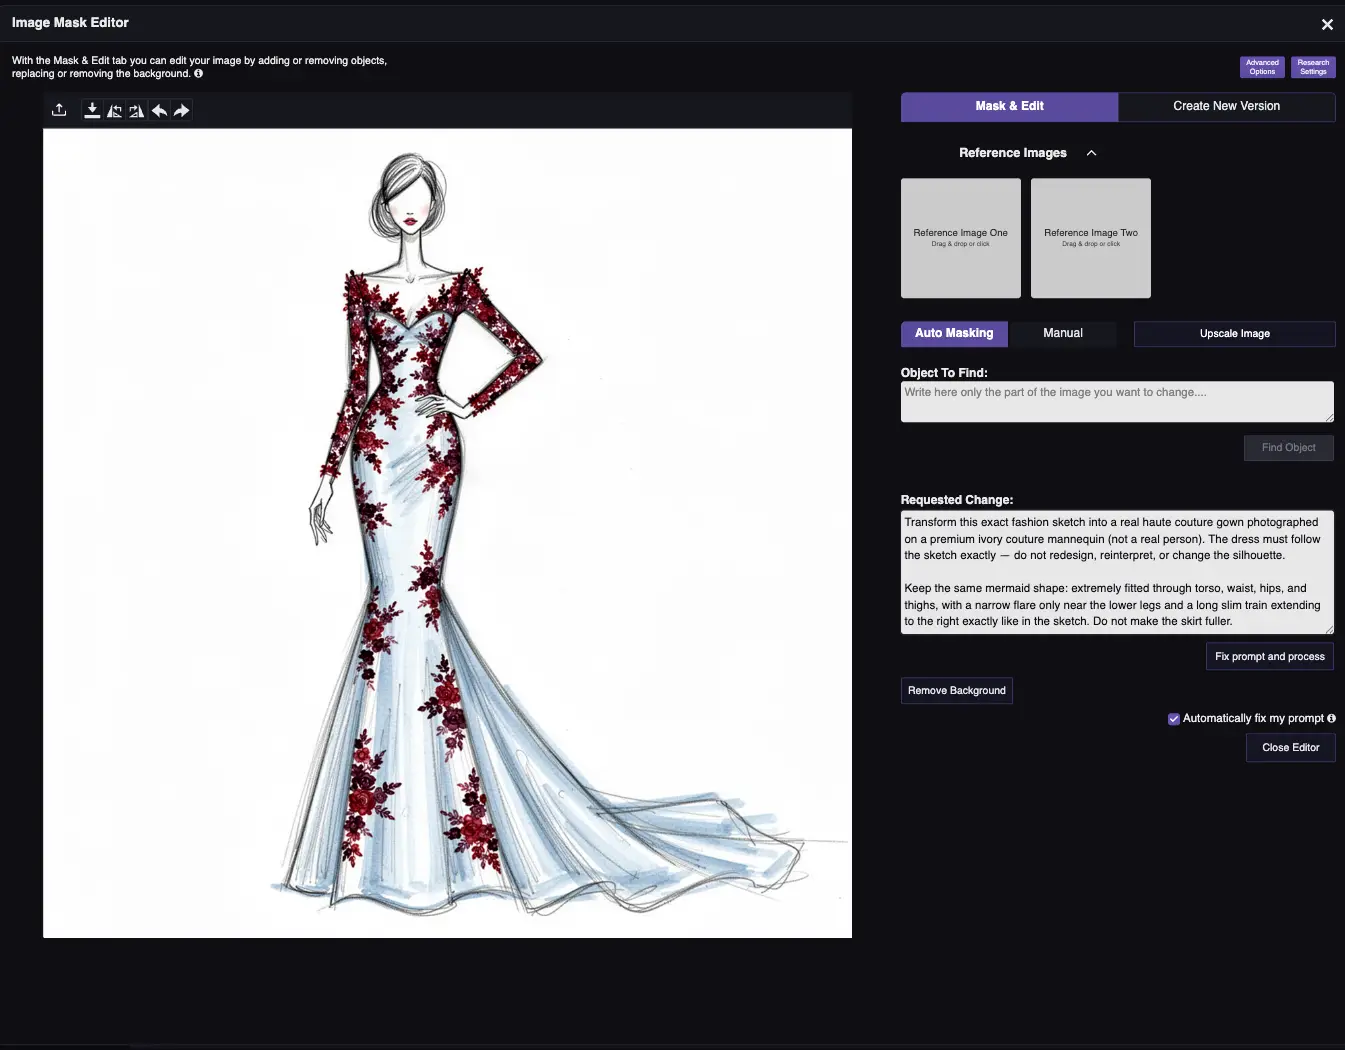
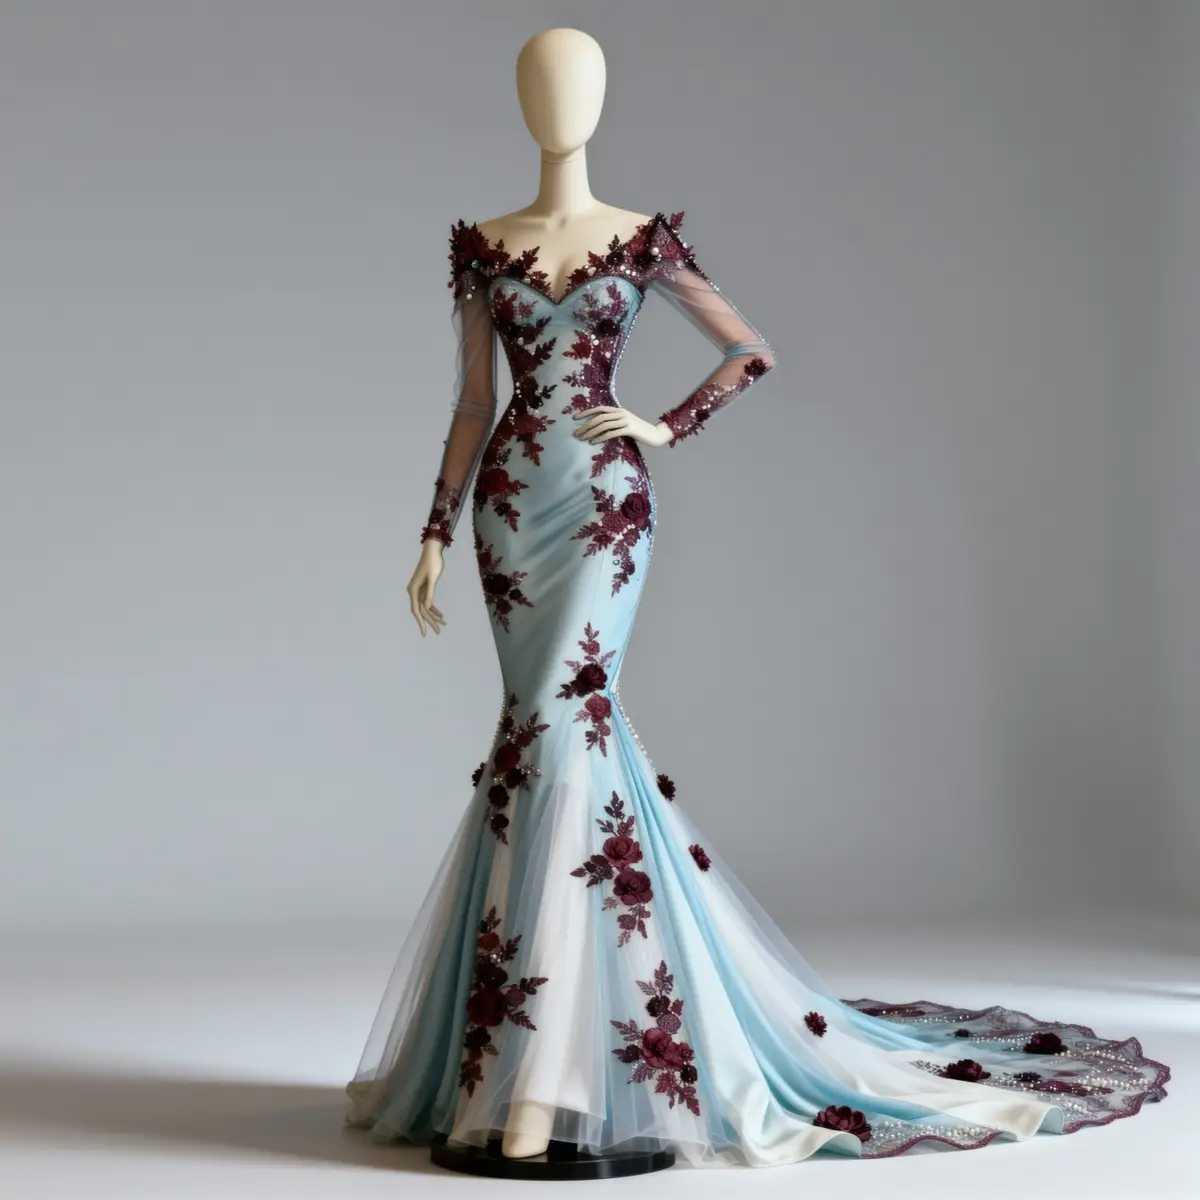
Sketch to Image — Turn Any Drawing into a Professional Photo
Method: Upload sketch/drawing + prompt in editor
Transform drawings and sketches into professional, photorealistic images. [SEO-lisäys] Turn sketches to images with AI in three steps — upload, describe, generate. Works with rough hand-drawn sketches, digital wireframes, fashion design drawings, and architectural floor plans.
How it works:
- Upload your sketch or drawing to the editor
- Describe what the final image should look like
- RogerApp.ai transforms the sketch into a professional photo
Example prompts:
- “Transform this sketch into a photorealistic fashion dress, elegant fabric, studio lighting, white background, ready for product page”
- “Convert this floor plan sketch into a realistic interior design photo, modern Scandinavian style, warm lighting”
- “Turn this product design sketch into a professional product photo on white background, suitable for e-commerce”
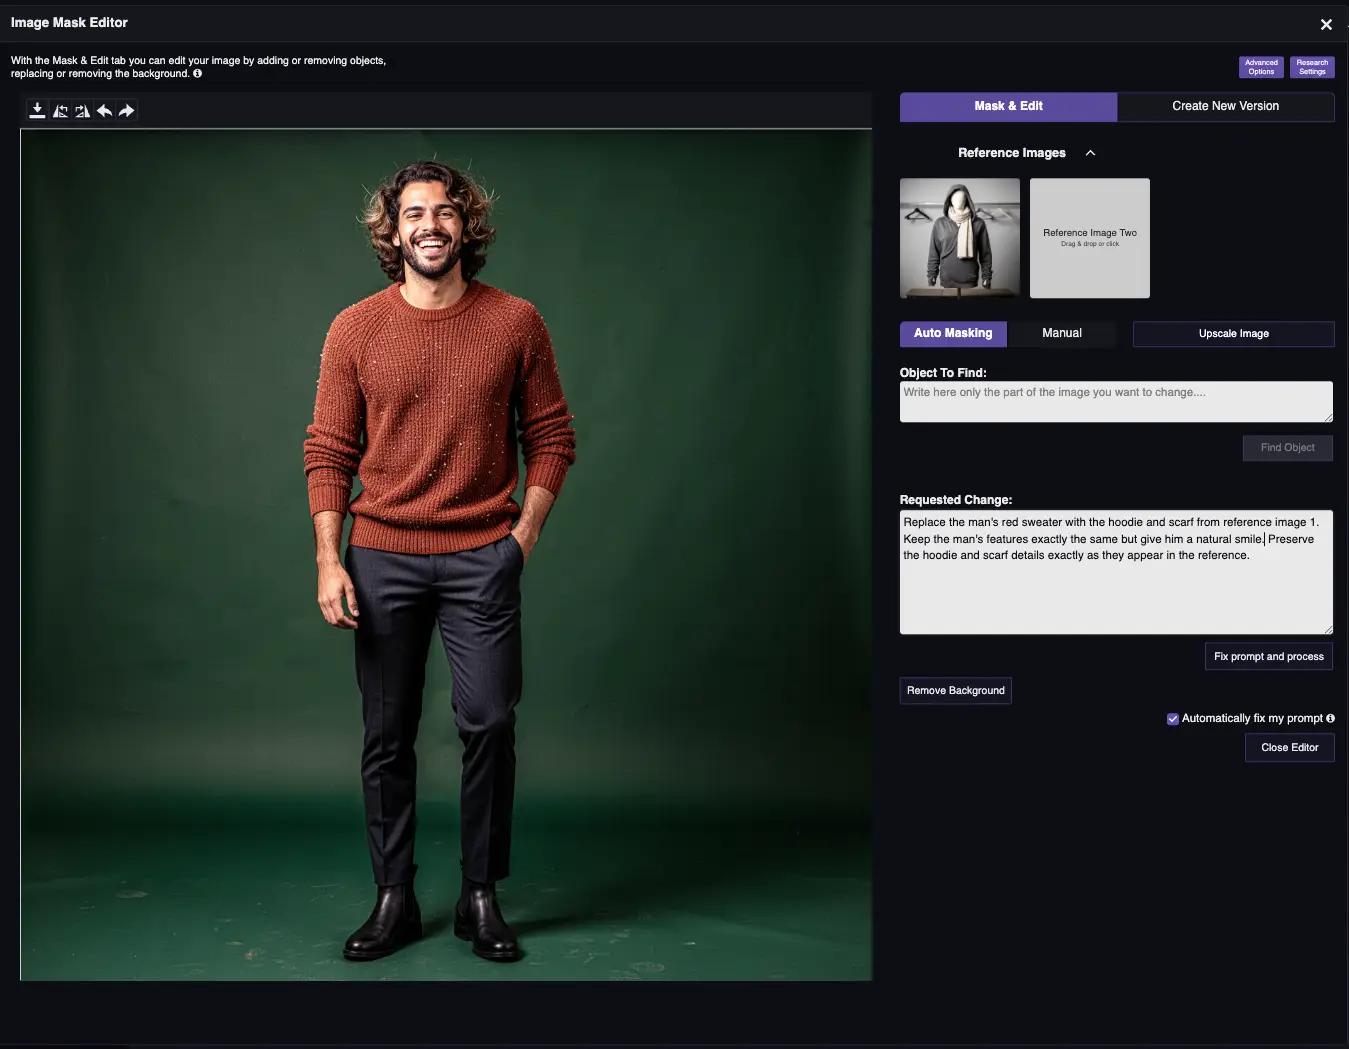
AI Clothes Changer — Fashion, Jewelry Try-On & Consistent Characters
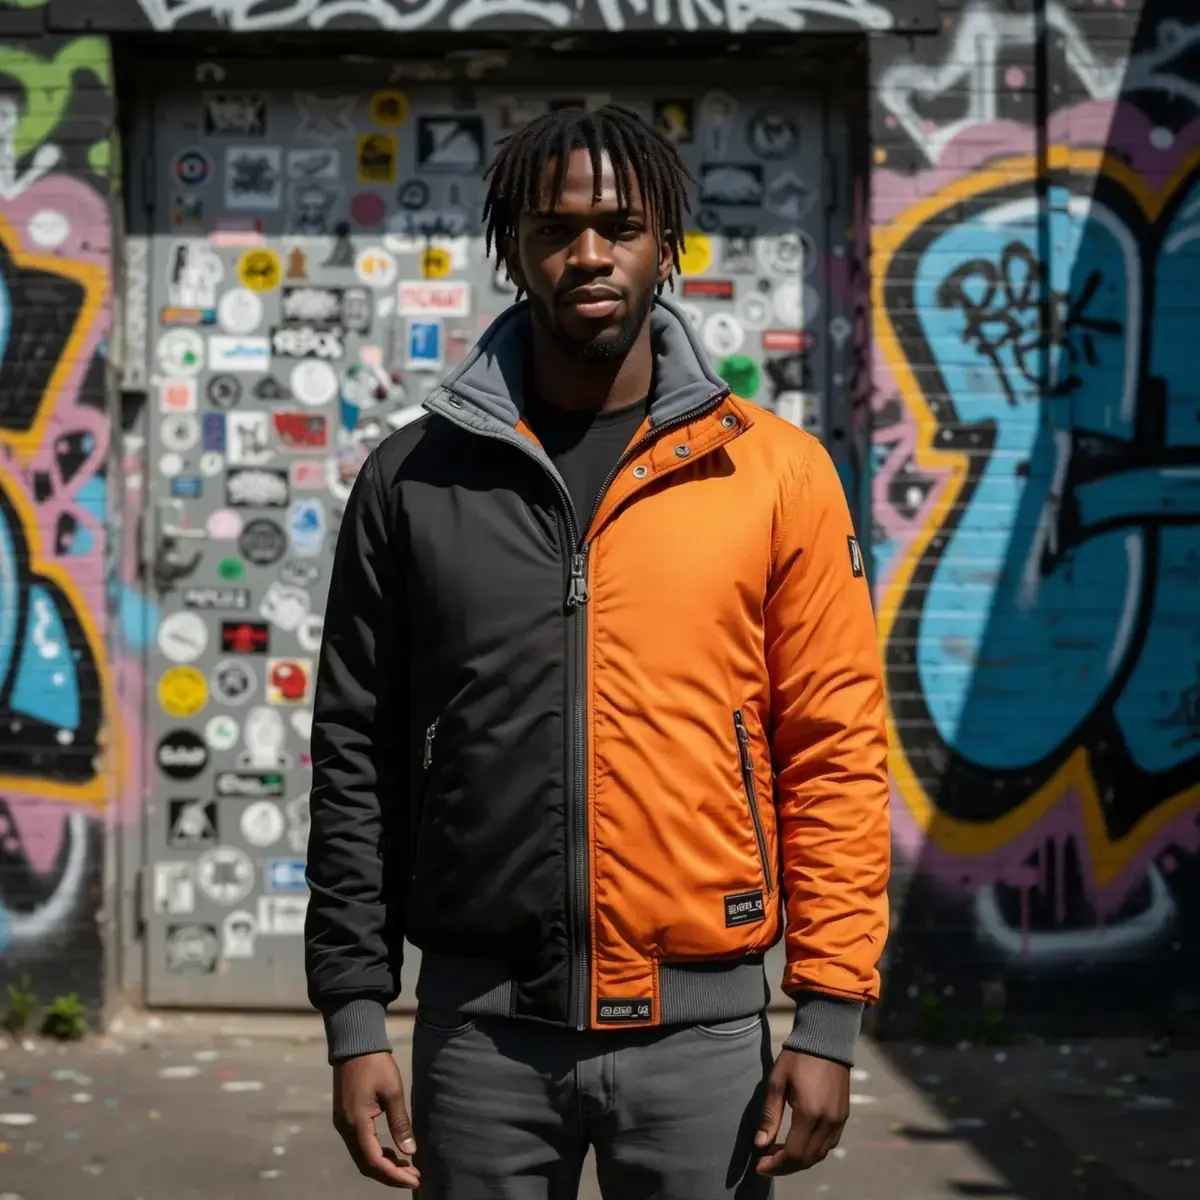
AI Clothes Changer — Change Outfits, Dresses & Hair
Method: Via masking tools + prompt
The AI clothes changer lets you swap outfits, change dresses, update garment colors, and modify hairstyles directly on any model photo — without a reshooting. Whether you need a full outfit change or just want to update a single clothing item, RogerApp.ai’s AI clothing changer handles it with precision masking.
How to change clothes:
- Use Auto-Masking (type “shirt”, “dress”, or “jacket” in Object to find) or Manual Masking
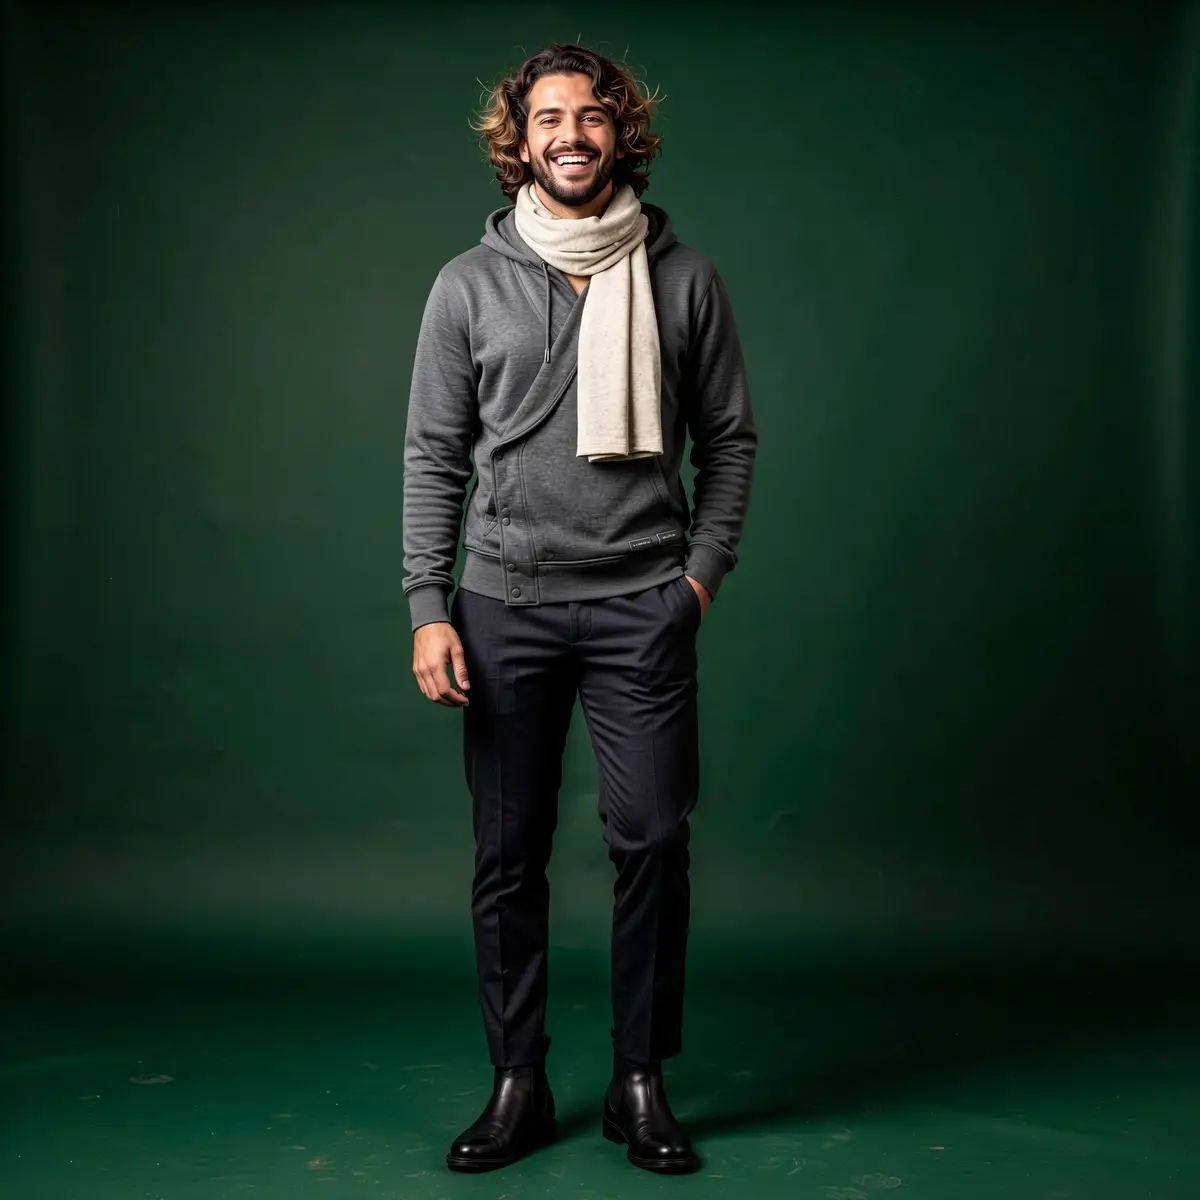
- Describe the new garment in your prompt — include fabric, color, fit, and style details
How to keep the same face across outfit changes: Mask only the clothing — leave the face unmasked. The AI won’t regenerate the face, keeping it identical while only changing the garments. This is the core workflow for fashion lookbooks and multi-variant product pages where the same model wears different styles.
How to change hair:
- Use Auto-Masking with “hair” in the Object to find field
- Describe the new hairstyle, length, or color in your prompt
Pro tip: For multiple product variants on the same model, mask only the garments each time. The model’s face, skin tone, and pose stay perfectly consistent across all variations — giving your store a professional, cohesive look.
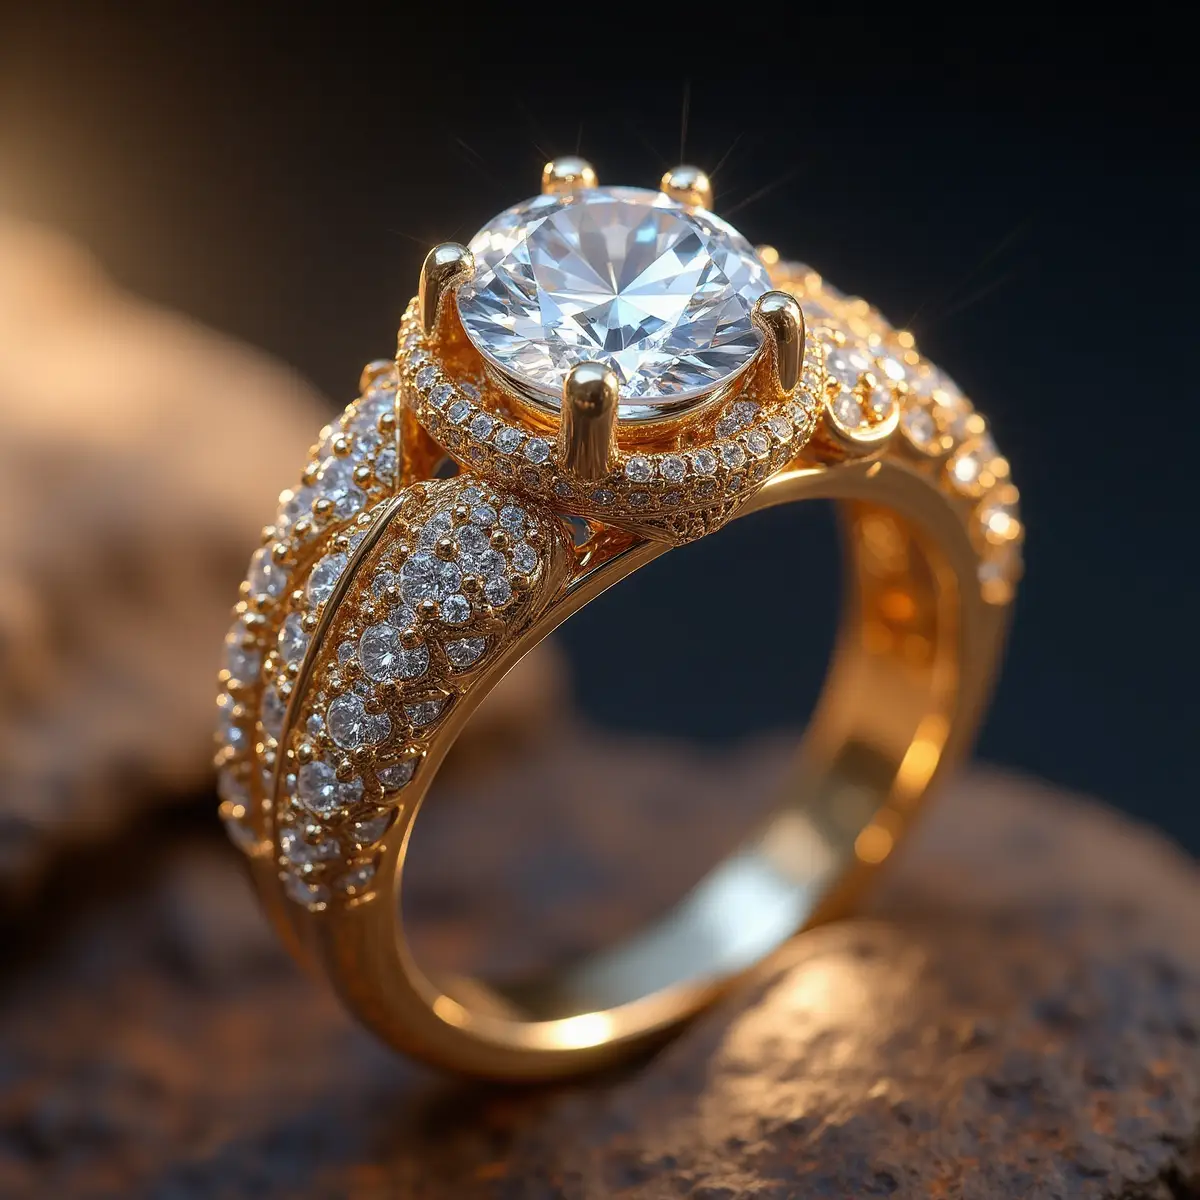
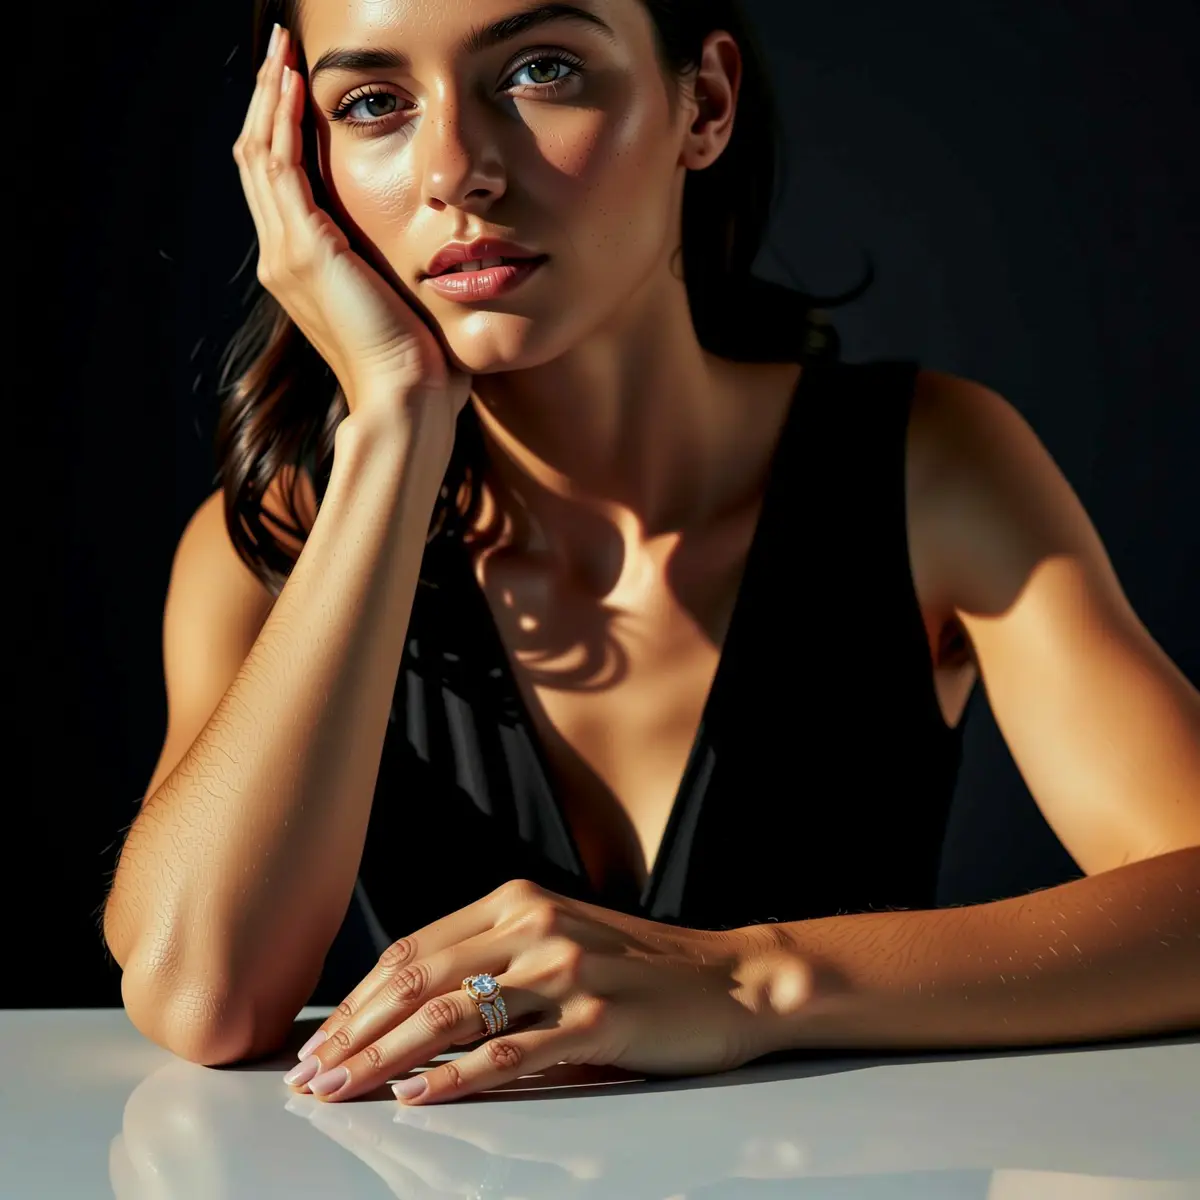
Virtual Ring Try-On — AI Jewelry Visualizer
Use RogerApp.ai as a virtual ring try-on tool and AI jewelry visualizer. Upload a hand photo and a product photo of the ring, then merge them to show the ring being worn — without a model booking or a photography session. The same workflow applies to necklaces, bracelets, earrings, and other jewelry pieces.
This makes RogerApp.ai a practical solution for jewelry e-commerce stores that need virtual jewelry try-on images at scale — especially for engagement rings, where shoppers specifically search for virtual engagement ring try-on options before buying. You can also combine the jewelry with a full lifestyle shoot — place the ring on a model wearing an evening dress, add a matching necklace, and set the scene with a lifestyle background, all from separate product photos merged together.
Workflow:
- Upload the hand (or model) photo as your main image
- Upload the jewelry product photo as the reference
- Use Merge Images and describe the placement: “Place the ring on the ring finger of the right hand, matching the lighting and skin tone of the hand photo”
- Refine with masking if needed for precise placement
Example prompts:
- “Place the engagement ring on the ring finger of the right hand, matching the natural skin tone and lighting of the hand, realistic metal reflection”
- “Add the necklace around the model’s neck in the main photo, matching the lighting and skin tone, natural drape of the chain”
Pro tip: For multiple product variants on the same model, mask only the garments each time. The model’s face, skin tone, and pose stay perfectly consistent across all variations — giving your store a professional, cohesive look.
Create Consistent AI Characters Across Multiple Images
Method: Via masking + merge + reference photos
Keep the same character across multiple images using masking and reference photos. RogerApp.ai’s AI consistent character generator & editor lets you build an entire campaign around a single model — different outfits, backgrounds, and poses — with the face staying identical throughout. For e-commerce and dropshipping sellers who need to create consistent characters with AI across dozens of product variants, this is the feature that makes it practical at scale.
Whether you call it character consistency AI, consistent AI characters, or simply creating consistent characters with AI — the workflow is the same: the model’s face, skin tone, and expression are locked, and only the outfit or scene changes. Upload your model photo, add the new garment or background as a reference, and describe the change. The AI image generator keeps consistent characters across every variation automatically.
Workflow:
- Create or select your base character image
- For each new scene, use the base image as reference
- Use Manual Masking to protect the face (leave it unmasked)
- Change the outfit, background, or pose via prompt
- The face stays identical across all variations
Use cases:
- Fashion lookbooks with one model in multiple outfits
- Dropshipping product pages where the same model wears different variants
- Social media content series with a recurring brand character
- Real estate virtual staging with a consistent lifestyle model
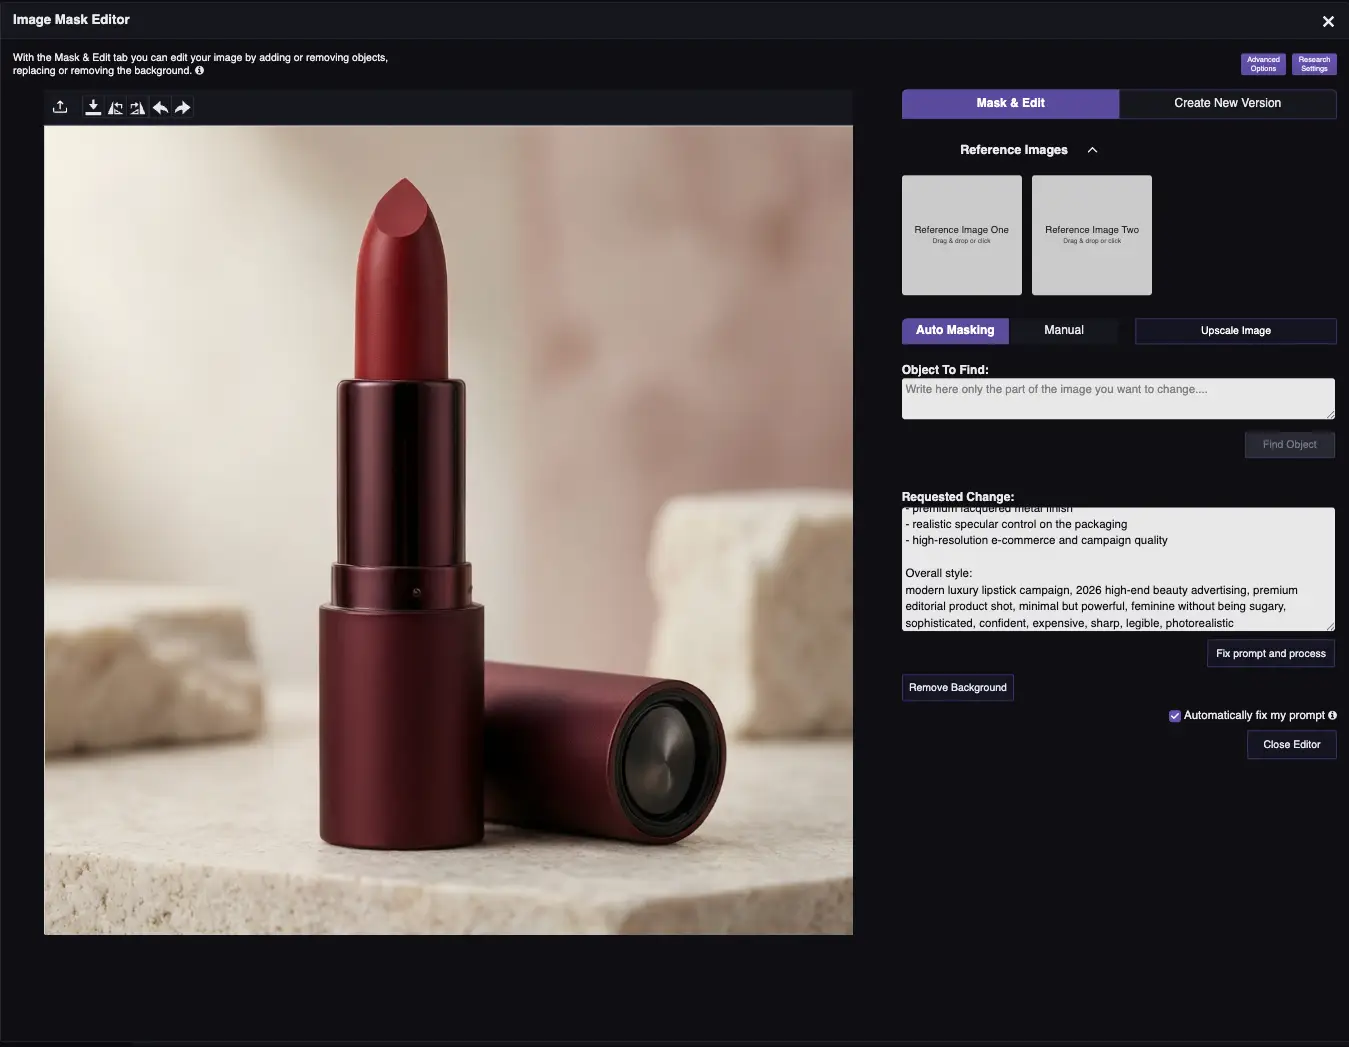
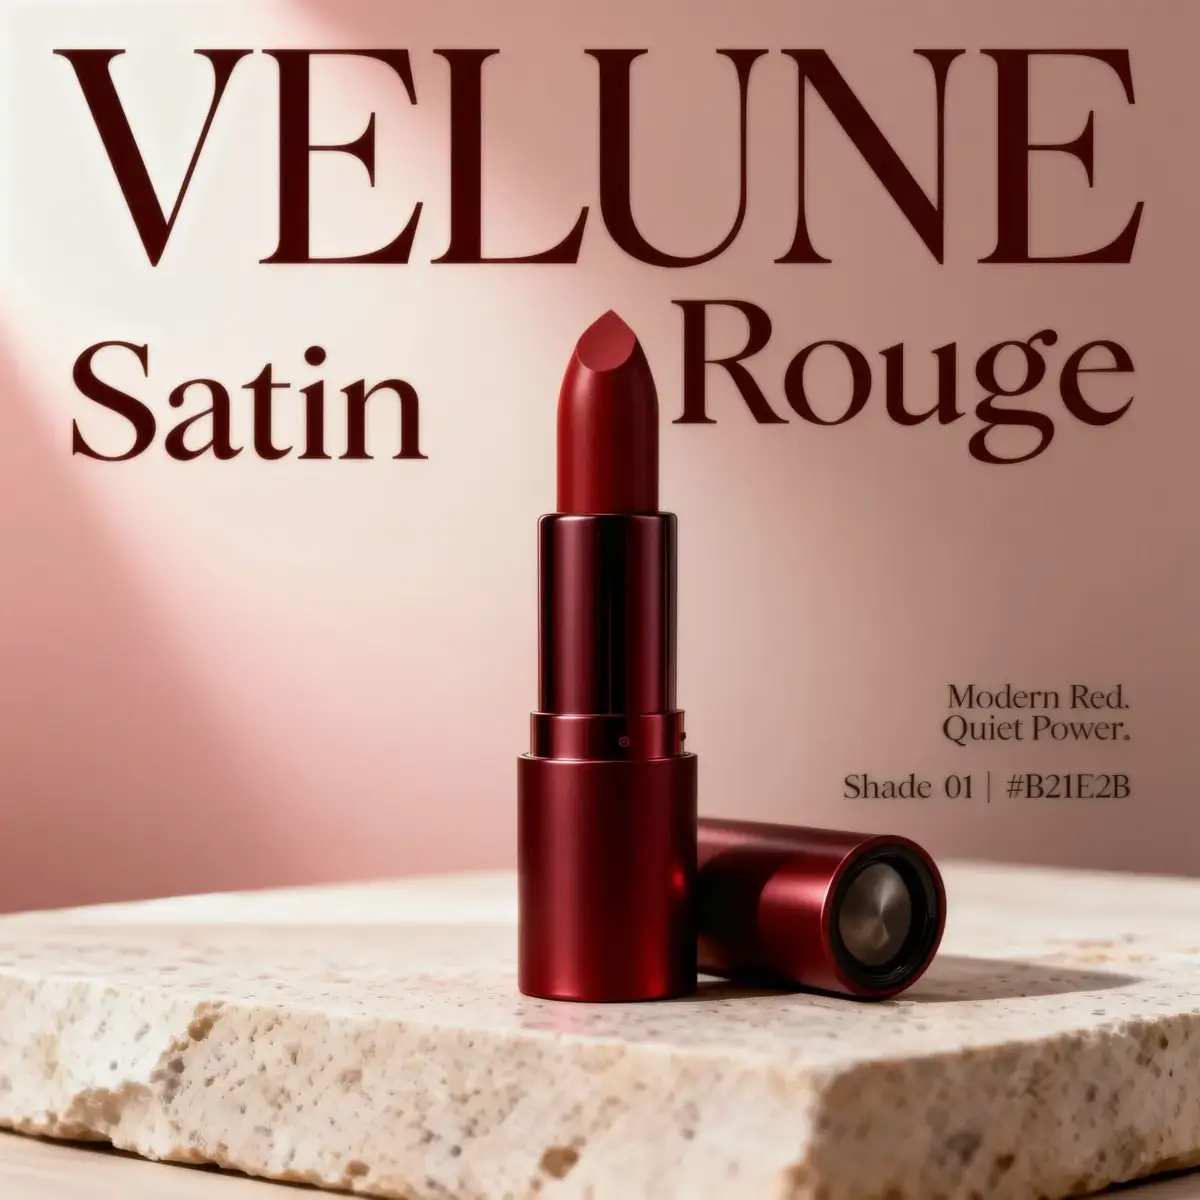
Add Text to Photos — Prices, Labels & Campaign Messages
Method: Via editor tools + prompt
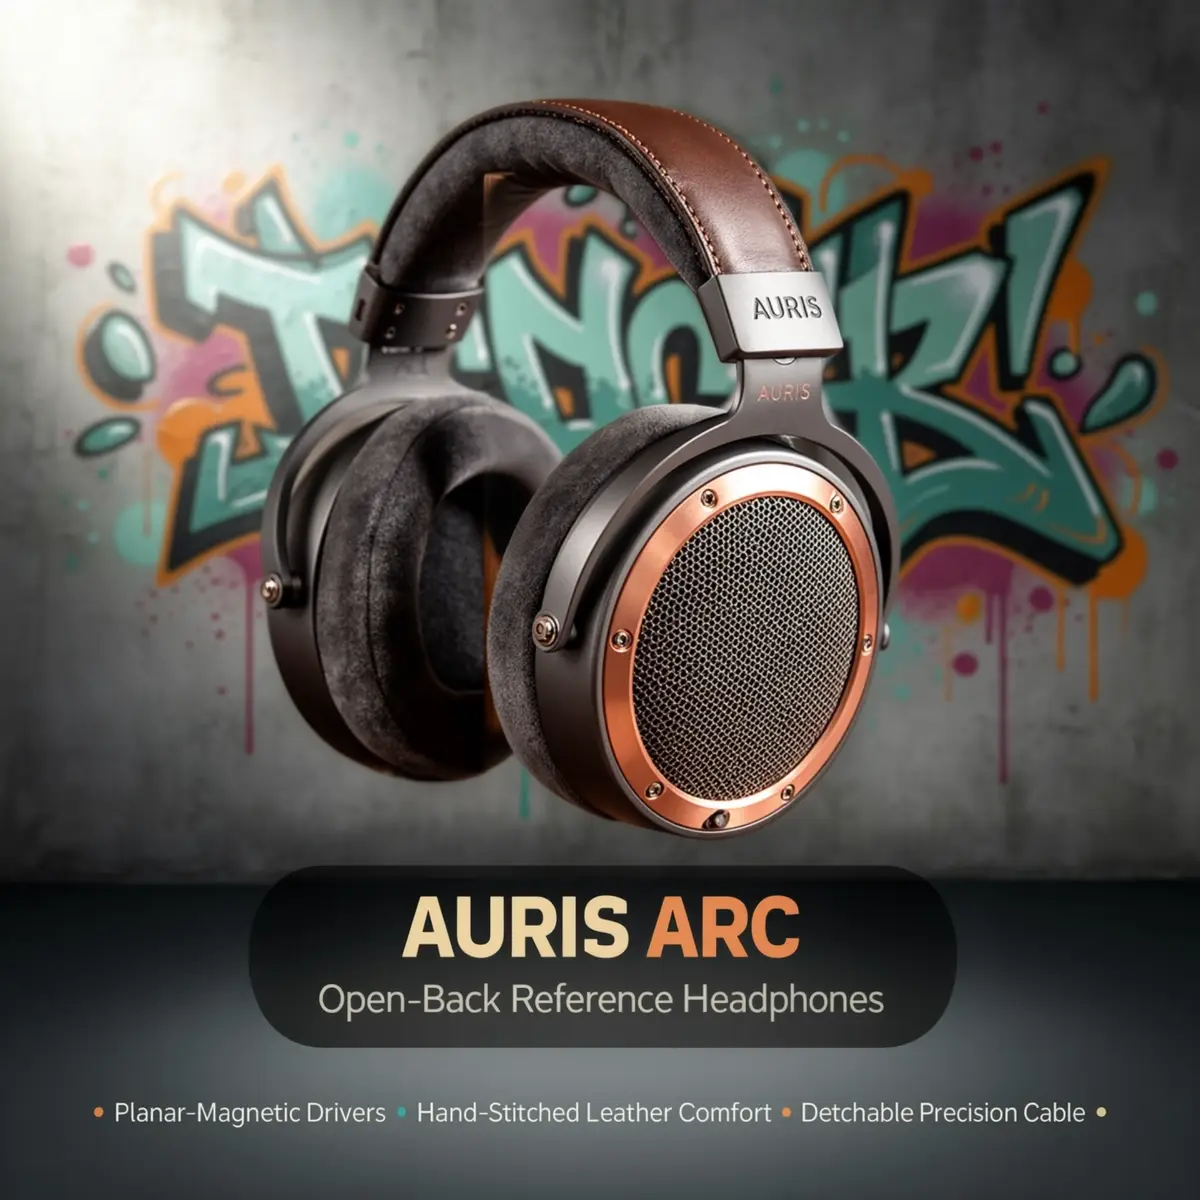
Add text directly in the photo — define font, size, and color to add price tags, campaign labels, or short messages on the product photo without leaving the editor. Unlike Photoshop where text sits as a separate layer, RogerApp.ai can integrate text as part of the image itself — painted onto surfaces, embedded into backgrounds as graffiti, etched into materials, or rendered as part of the scene. No layer management, no separate software needed.
Add text directly in the photo — define font, size, and color to add price tags, campaign labels, or short messages on the product photo without leaving the editor.
How it works:
- Upload your photo to the editor
- In the “Requested Change” field, describe the text you want to add: font style, size, color, position, and the exact text
- Example prompt: “Add the text ‘SALE 30% OFF’ in bold white sans-serif font in the top right corner of the image”
Use cases:
- Price tags and discount labels on product photos
- Campaign messaging on social media images
- Brand name overlays on lifestyle photos
Add Product Labels, Stickers & Branding with AI
Method: Via editor tools + prompt
Apply product labels, stickers, and branding elements to your photos realistically — matching the surface curvature, lighting, and perspective of the original image. Unlike the Add Text feature which adds standalone typography, Add Labels places a fully designed label onto a product photo so it looks like it was there from the original shoot. This is the right tool for adding branding to product photos at scale.
How it works:
- Upload your product photo as the main image
- Upload your label design as a reference photo
- Describe where and how the label should appear: “Apply the reference label to the front of the bottle, curved to match the bottle surface, lit consistently with the product lighting”